No, you cannot edit photos directly in Illustrator. Illustrator is primarily a vector-based design software.
Adobe Illustrator excels in creating and editing vector graphics. While it offers powerful tools for designing logos, icons, and illustrations, it is not intended for photo editing. To work on photos, Adobe Photoshop is the best-suited software. Illustrator can import photos for use in designs, but its editing capabilities for raster images are limited.
Users often combine the strengths of both Photoshop and Illustrator to achieve detailed and dynamic designs. By understanding the unique features of each program, designers can efficiently manage their creative projects. For high-quality photo manipulation, rely on Photoshop, and use Illustrator for vector-based tasks.
Introduction To Adobe Illustrator
Adobe Illustrator is a powerful vector graphics editor. It is widely used by designers for creating logos, illustrations, and artwork. Unlike raster graphics editors, Illustrator uses mathematical constructs to create vector graphics. This makes it ideal for designs that need to be scaled without losing quality.
Core Functions Of Illustrator
Illustrator offers various core functions to help designers bring their ideas to life. These include:
- Vector Drawing Tools: Pen, pencil, and brush tools create precise lines and shapes.
- Color Management: Advanced color controls and gradients for vibrant designs.
- Text Tools: Extensive text editing options for creating typography.
- Layer Management: Organize and edit elements using layers.
- Pathfinder Tools: Combine and manipulate shapes efficiently.
Differences Between Illustrator And Photoshop
| Feature | Illustrator | Photoshop |
|---|---|---|
| Graphics Type | Vector-based | Raster-based |
| Best Use | Logos, icons, illustrations | Photo editing, digital painting |
| Scalability | Infinitely scalable | Limited scalability |
| File Size | Generally smaller | Generally larger |
| Editing Tools | Pen, shape, type tools | Brush, clone, healing tools |
Understanding these differences helps in choosing the right tool for your design needs.
Basic Image Editing In Illustrator
Adobe Illustrator is a powerful tool. It is mainly used for vector graphics. Yet, it can also edit photos. Learn the basics of image editing in Illustrator.
Importing Photos
To start, you need to import your photo. Follow these simple steps:
- Open Adobe Illustrator.
- Go to File in the top menu.
- Select Place from the dropdown.
- Choose the photo from your computer.
- Click Place to import the photo.
Your photo is now in Illustrator. You can move it around or resize it.
Image Resizing And Cropping
Resizing and cropping are basic editing skills. Here’s how you can do it:
Resizing:
- Click on the photo to select it.
- Drag the corners to resize. Hold Shift to keep proportions.
Cropping:
- Select the Rectangle Tool from the toolbar.
- Draw a rectangle over the part you want to keep.
- Go to Object in the top menu.
- Choose Clipping Mask and then Make.
Your photo is now cropped. You can adjust the mask by moving the rectangle.
Advanced Image Manipulation
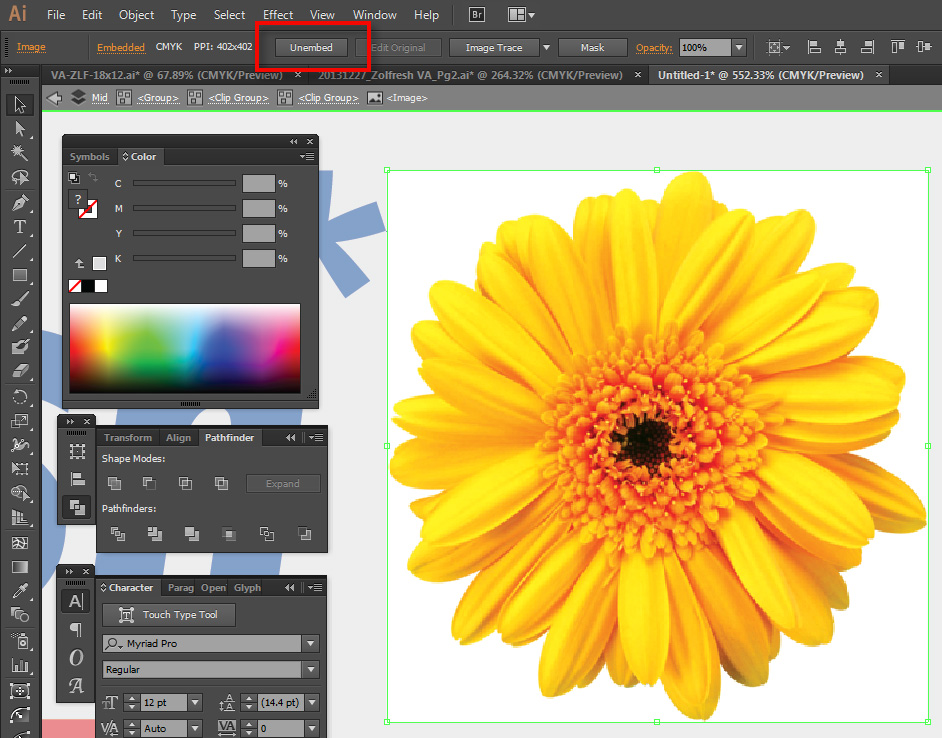
Advanced image manipulation in Adobe Illustrator allows for high-level photo editing. While Illustrator is primarily a vector graphics editor, it boasts robust tools for photo editing. These tools enable users to enhance images creatively and precisely.
Using Masks For Editing
Using masks is essential for non-destructive editing in Illustrator. Masks allow you to isolate and work on specific parts of an image. To create a mask, select the object or area you want to mask. Then, go to Object > Clipping Mask > Make. This action hides parts of the image outside the mask.
Masks can be edited anytime. Simply double-click the mask to enter isolation mode. Adjust the mask or the content within it to refine your edits. This method ensures flexibility and precision in your photo editing process.
Applying Filters And Effects
Applying filters and effects can drastically change the look of an image. In Illustrator, you can find these options under the Effect menu. Some popular effects include Gaussian Blur, Drop Shadow, and Inner Glow.
To apply a filter, select your image and navigate to Effect > Stylize. Choose an effect and adjust the settings in the dialog box. For instance, use Gaussian Blur to soften the image or Drop Shadow for a 3D effect.
You can stack multiple effects for complex edits. Manage these effects through the Appearance panel. This panel lets you edit, reorder, or remove applied effects easily.
| Effect | Purpose |
|---|---|
| Gaussian Blur | Softens the image edges |
| Drop Shadow | Adds depth and dimension |
| Inner Glow | Creates a glowing effect inside the object |
Credit: fastercourse.com
Vector Graphics Vs. Raster Images
Many people ask if you can edit photos in Illustrator. The answer depends on the type of image. There are two main types: vector graphics and raster images. Each type has its own strengths and weaknesses.
When To Use Vector Graphics
Vector graphics are made of paths and points. They are perfect for logos and illustrations. These images can be scaled to any size without losing quality. This makes them ideal for large prints or detailed designs.
Here are some advantages of vector graphics:
- Scalable without loss of quality
- Small file size
- Easy to edit individual elements
Use vector graphics when you need clean, scalable images. They are best for logos, icons, and detailed illustrations.
How Illustrator Handles Raster Images
Raster images are made of pixels. Photos are usually raster images. These images can lose quality if resized. Illustrator can work with raster images, but it is not the best tool for heavy photo editing.
Here are some points to consider:
- Editing options are limited
- Not ideal for resizing
- Better for simple adjustments
Use Illustrator for raster images if you need to make basic edits. For advanced photo editing, use software like Photoshop.
Color Adjustments In Illustrator
Adobe Illustrator is known for its vector design capabilities. But you can also make color adjustments to photos. This includes changing color balance, working with gradients, and using swatches. These features help you create stunning visuals with precise color control.
Changing Color Balance
Adjusting the color balance can change the mood of your photo. To do this:
- Open your photo in Illustrator.
- Select the photo using the Selection Tool.
- Go to the menu and click on Edit.
- Choose Edit Colors and then Adjust Color Balance.
A dialog box will appear. Here, you can adjust the sliders for Cyan, Magenta, and Yellow. Each slider changes the photo’s color balance. Adjust until you get the desired effect.
Working With Gradients And Swatches
Gradients and swatches add depth and variety to your photos. Gradients blend two or more colors smoothly. Swatches are preset colors you can use consistently.
To apply a gradient:
- Select the Gradient Tool from the toolbar.
- Click on the object or area you want to fill.
- Choose a gradient from the Gradient Panel.
- Adjust the gradient’s angle, position, and colors.
To use swatches:
- Open the Swatches Panel.
- Select the object or area you want to color.
- Click on a swatch to apply it.
You can also create custom swatches. Just click the New Swatch button in the Swatches Panel. Name your swatch and save it for future use.

Credit: m.youtube.com
Text And Typography
Adobe Illustrator offers robust features for text and typography. It is a powerful tool for editing photos. You can add text, customize fonts, and create stunning effects.
Adding Text To Images
Adding text to images in Illustrator is simple. First, select the Text Tool from the toolbar. Click on the area where you want the text. Type your desired text. You can move and resize the text box as needed. This makes your images more engaging and informative.
Customizing Font Styles And Effects
Illustrator provides numerous ways to customize font styles. Here are a few key options:
- Font Selection: Choose from a wide range of fonts.
- Size: Adjust the font size easily.
- Color: Change the text color to match your design.
You can also add effects to your text:
- Shadow: Add a shadow for depth.
- Outline: Create an outline around your text.
- Gradient: Apply gradient colors for a unique look.
To add these effects, go to the Effects Menu. Select the desired effect and apply it. This enhances your text and makes it stand out.
Tips And Tricks For Photo Editing
Adobe Illustrator is a great tool for editing photos. It offers unique features that make photo editing fun and easy. Here are some tips and tricks to help you get started with photo editing in Illustrator.
Shortcuts For Faster Editing
Using shortcuts can save you a lot of time. Here are some of the most useful shortcuts:
- Ctrl + Z: Undo your last action.
- Ctrl + C: Copy the selected object.
- Ctrl + V: Paste the copied object.
- Ctrl + G: Group selected objects.
- Ctrl + Shift + G: Ungroup selected objects.
- Ctrl + +: Zoom in on your canvas.
- Ctrl + –: Zoom out of your canvas.
Integrating Illustrator With Other Adobe Tools
Illustrator works well with other Adobe tools. This integration allows you to enhance your workflow. Here are some ways to integrate Illustrator with other Adobe tools:
| Tool | Usage |
|---|---|
| Photoshop | Edit raster images and import them into Illustrator. |
| Lightroom | Organize and edit photos before importing them into Illustrator. |
| InDesign | Use Illustrator graphics in your print layouts. |
By integrating these tools, you can create stunning visuals. This also makes your editing process more efficient.
Exporting Your Edited Photos
Editing photos in Illustrator is fun and creative. But after editing, you need to export your photos. This ensures they look great wherever you use them. Exporting can be tricky if you don’t know the right settings. Below, learn about choosing the right file format and optimizing images.
Choosing The Right File Format
Choosing the correct file format is crucial. Each format has its own strengths.
| File Format | Best For | Details |
|---|---|---|
| JPEG | Web | Small file size, good quality |
| PNG | Web | Supports transparency, higher quality |
| TIFF | High quality, large file size | |
| SVG | Web and Print | Scalable, vector format |
Optimizing Images For Web And Print
Optimizing images ensures they load quickly and look sharp.
- For Web: Reduce file size to improve load times.
- Use JPEG or PNG format.
- Keep image dimensions within 1920px width.
For print, prioritize quality over file size.
- Use TIFF or SVG format.
- Set resolution to 300 DPI.
- Ensure color mode is CMYK.
Following these tips will ensure your images look their best. Whether on screen or in print, your edited photos will shine.
Case Studies And Examples
Editing photos in Illustrator offers creative freedom. This section explores real-life scenarios and showcases designs made with Illustrator.
Real-life Photo Editing Scenarios
Illustrator is known for vector graphics. Yet, it can enhance photos in unique ways. Let’s dive into some real-life photo editing scenarios:
- Retouching Portraits: Smooth skin, adjust lighting, and enhance features.
- Product Photos: Remove backgrounds, add shadows, and highlight details.
- Social Media Graphics: Create engaging posts with text overlays and filters.
| Scenario | Action | Result |
|---|---|---|
| Retouching Portraits | Smoothing skin | Enhanced features |
| Product Photos | Removing backgrounds | Clear focus on product |
| Social Media Graphics | Adding text overlays | Engaging posts |
Showcase Of Designs Made With Illustrator
Illustrator can create stunning visuals. Here are some examples:
- Vectorized Photos: Transform photos into vector art. This is great for logos and icons.
- Photo Collages: Combine multiple images. Add vector elements for a unique look.
- Infographics: Use photos with vector graphics. Create informative and visually appealing designs.
These examples show Illustrator’s versatility. It’s not just for vector art. It’s a powerful tool for photo editing too.
Credit: community.adobe.com
Frequently Asked Questions
Is Adobe Illustrator Good For Editing Photos?
Adobe Illustrator is not ideal for photo editing. It excels in vector graphics and illustration. Use Adobe Photoshop for photo editing.
Can You Edit Photos In Ai?
Yes, AI can edit photos. Tools like Adobe Photoshop and Luminar AI use AI to enhance and manipulate images.
Can You Use Photos In Illustrator?
Yes, you can use photos in Illustrator. Import photos by selecting “File” and then “Place. ” Edit and manipulate photos within the software.
How To Do Image Adjustments In Illustrator?
Open your image in Illustrator. Use the “Edit” menu to access “Adjust Colors” or “Image Trace” for adjustments.
Conclusion
Editing photos in Illustrator offers unique advantages. While not a traditional photo editor, it excels in vector graphics. Use Illustrator for creative photo manipulations and combining vector elements. For detailed photo edits, consider specialized tools. Enhance your design toolkit by mastering Illustrator’s photo editing capabilities.
Explore, experiment, and elevate your graphic design skills.