To host on Hostinger, create an account, choose a hosting plan, and set up your domain. Follow the guided steps to configure your website.
Hostinger is a popular web hosting service known for its affordability and reliability. Users can easily create an account and choose from a variety of hosting plans tailored to different needs. Hostinger provides a user-friendly interface, making it simple to set up your domain and website.
The platform supports various content management systems, including WordPress, making it versatile for different types of websites. Hostinger also offers excellent customer support and a wealth of resources to help users through the hosting process. Whether you’re a beginner or an experienced webmaster, Hostinger provides the tools and support needed to get your website online efficiently.
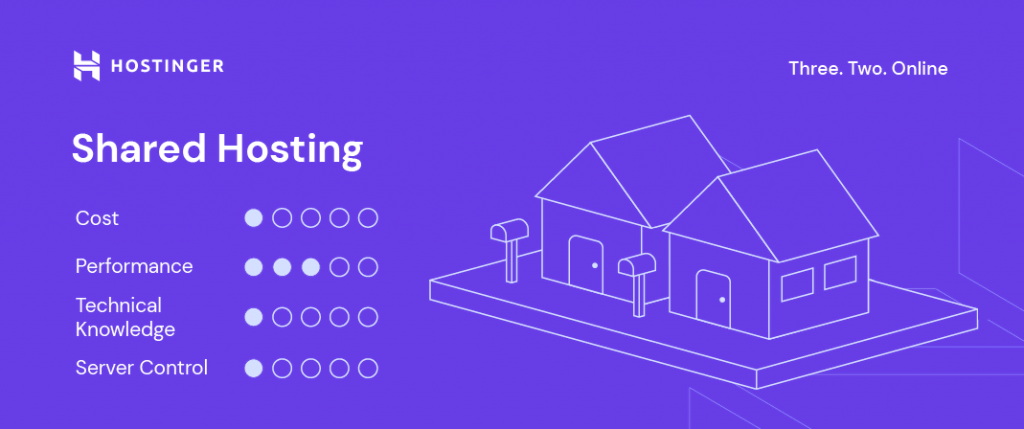
Choosing A Hosting Plan
Choosing the right hosting plan is crucial for your website’s success. Hostinger offers various plans to fit different needs and budgets. This guide will help you make an informed decision.
Budget Considerations
First, determine how much you can spend on hosting. Hostinger provides plans for every budget. Here are some options:
- Single Shared Hosting: Ideal for small websites. Low cost, basic features.
- Premium Shared Hosting: More resources and features. Great for growing sites.
- Business Shared Hosting: High performance, essential for e-commerce.
Think about your website’s future growth. Starting small can save money, but upgrading later is easy.
Plan Features
Hostinger’s plans come with different features. Comparing these can help you choose the best one:
| Feature | Single | Premium | Business |
|---|---|---|---|
| Websites | 1 | Unlimited | Unlimited |
| Email Accounts | 1 | Unlimited | Unlimited |
| Bandwidth | 100 GB | Unlimited | Unlimited |
| Free Domain | No | Yes | Yes |
| SSL Certificate | Yes | Yes | Yes |
Evaluate your needs based on these features. For a simple blog, a Single plan might suffice. If planning multiple sites, Premium offers more flexibility. Business plan is best for online stores with higher traffic.
Credit: www.hostinger.com
Setting Up Your Account
Getting started with Hostinger is easy and quick. You need to set up your account first. Follow these steps to start hosting on Hostinger.
Registration Process
Begin by visiting the Hostinger website. Click on the Sign Up button. You’ll be redirected to the registration page.
Fill in your email address and choose a strong password. Make sure your password is unique and secure. You can also use your Google or Facebook account to sign up.
After filling in your details, click on the Create Account button. You will now have a Hostinger account. Next, you need to choose a hosting plan. Hostinger offers various plans to suit your needs.
| Plan | Features | Price |
|---|---|---|
| Single Shared Hosting | 1 Website, 30 GB SSD, 1 Email Account | $1.99/month |
| Premium Shared Hosting | 100 Websites, 100 GB SSD, Free Domain | $2.99/month |
| Business Shared Hosting | 100 Websites, 200 GB SSD, Free SSL | $4.99/month |
Account Verification
After choosing your plan, you need to verify your account. Check your email for a verification link. Open the email and click on the Verify Email button.
Once your email is verified, you can proceed with the payment. Hostinger supports various payment methods like credit cards, PayPal, and cryptocurrencies.
- Go to your dashboard.
- Navigate to the Billing section.
- Select your payment method and complete the payment.
After payment, your hosting plan will be activated. You can now start using your Hostinger account.
Make sure to update your profile information in your dashboard. This includes your name, address, and contact details. Keeping your profile updated helps in smooth account management.
Domain Name Selection
Domain Name Selection is a crucial step in creating your online presence. Your domain name represents your brand and influences your site’s visibility on search engines. Hostinger provides an easy and seamless way to secure a domain name that fits your needs.
Choosing A Domain
The first step in domain name selection is choosing a domain that resonates with your brand. Follow these tips to make the right choice:
- Keep it short and simple. Shorter names are easier to remember.
- Use keywords related to your business. This helps with SEO.
- Avoid numbers and hyphens. They can be confusing and hard to type.
- Choose a suitable extension. Popular options include .com, .net, and .org.
Consider using a domain name generator if you’re stuck. These tools provide creative suggestions based on your input keywords.
Domain Registration
After selecting the perfect domain name, the next step is domain registration. Hostinger makes this process straightforward. Follow these steps:
- Visit Hostinger’s website and navigate to the domain registration page.
- Enter your chosen domain name in the search bar to check its availability.
- If the domain is available, add it to your cart and proceed to checkout.
- Fill in your personal details and complete the payment process.
- After payment, your domain is registered and ready to use.
Hostinger often offers promotions and discounts on domain registrations, so keep an eye out for deals.
Once registered, your domain will appear in your Hostinger account dashboard. From there, you can manage your domain settings, DNS records, and more.
Navigating The Control Panel
Hosting a website on Hostinger can be simple and straightforward. The first step is to navigate the control panel effectively. Understanding the control panel is crucial for managing your website. This guide will help you explore the key areas of the Hostinger control panel.
Dashboard Overview
The dashboard is the central hub of your Hostinger account. It provides an overview of your website’s status. You can see important information at a glance.
On the dashboard, you can find:
- Account details
- Website statistics
- Recent activity
- Notifications
The dashboard also gives quick access to essential functions. These include managing domains, setting up email accounts, and checking server status.
Key Tools And Features
Hostinger’s control panel comes packed with powerful tools. These tools help you manage your website with ease.
Some of the key tools and features include:
| Tool | Description |
|---|---|
| File Manager | Allows you to upload, edit, and manage your website files. |
| Auto Installer | Helps you install popular apps like WordPress with one click. |
| Domain Manager | Enables you to manage your domains, subdomains, and DNS settings. |
| Email Accounts | Lets you create and manage professional email accounts. |
| Backup Manager | Allows you to create and manage backups of your website. |
Using these tools, you can efficiently manage your website. Whether you are uploading files or setting up emails, Hostinger makes it easy.
Installing WordPress
Installing WordPress on Hostinger is simple and efficient. You have two options: One-Click Installation or Manual Setup. Both methods are effective, ensuring a smooth setup process.
One-click Installation
Hostinger offers a One-Click Installation feature for WordPress. This is the fastest way to get started. Follow these steps:
- Log in to your Hostinger account.
- Navigate to the hPanel.
- Click on the Website section.
- Select Auto Installer.
- Choose WordPress from the list.
- Fill in the required details.
- Click Install.
Your WordPress site is now being installed. It takes only a few minutes. You will receive a confirmation once it’s done.
Manual Setup
If you prefer a more hands-on approach, you can opt for a manual setup. This method gives you more control over the installation process.
Here’s how to do it:
- Download the latest version of WordPress from wordpress.org.
- Log in to your Hostinger account.
- Navigate to the hPanel.
- Go to the File Manager.
- Upload the downloaded WordPress file to your public_html directory.
- Extract the files.
- Create a new MySQL Database and user.
- Note down the database name, username, and password.
- Go to your domain (e.g., yoursite.com).
- Follow the on-screen instructions to complete the setup.
Ensure you input the correct database details during the setup. This is crucial for a successful installation.
Both methods are user-friendly and effective. Choose the one that suits your needs best.
Configuring Website Settings
Configuring website settings is crucial for a successful online presence. On Hostinger, this process is straightforward. This guide will help you configure your website settings easily.
General Settings
First, log in to your Hostinger account. Navigate to the hPanel. Here, you’ll find the General Settings option. This section includes:
- Site Title: Name your website.
- Tagline: A brief description of your site.
- Admin Email: Your contact email address.
Fill in each field carefully. A clear site title and tagline improve SEO.
Advanced Configurations
Next, explore the Advanced Configurations section. This area includes:
| Setting | Description |
|---|---|
| Permalinks | Customize your URL structure for better SEO. |
| Time Zone | Set the correct time zone for your site. |
| Language | Select the language for your site. |
Choose the appropriate settings based on your audience. Configuring permalinks is vital for SEO. Use a simple and clear URL structure.
Setting the correct time zone ensures accurate time-stamping for your posts. Selecting the right language enhances user experience.
Enhancing Security
Securing your website is crucial. Hostinger offers multiple tools to enhance your site’s security. Let’s explore some key features to keep your site safe and secure.
Ssl Certificates
An SSL Certificate encrypts data between your website and visitors. This prevents hackers from stealing information. Hostinger provides free SSL certificates with most plans. Follow these simple steps to activate SSL:
- Log in to your Hostinger account.
- Go to the Dashboard.
- Find the SSL section and click Activate.
- Select the domain you want to secure.
- Click Install and wait for confirmation.
With SSL, visitors trust your site more. This can improve your search engine ranking.
Security Plugins
Security plugins add an extra layer of protection to your site. Hostinger supports various plugins to keep your website safe. Some popular plugins include:
- Wordfence: This plugin offers firewall protection and malware scanning.
- iThemes Security: It provides multiple features like brute force protection.
- Sucuri: Known for its malware cleanup and security audits.
To install a security plugin on Hostinger:
- Log in to your WordPress dashboard.
- Go to Plugins and click Add New.
- Search for the desired security plugin.
- Click Install Now, then Activate.
Regularly update your plugins. This ensures maximum protection against new threats.

Credit: m.youtube.com
Optimizing Website Performance
Optimizing your website performance is crucial for user experience and SEO. Faster websites have lower bounce rates and higher engagement. Hostinger offers tools to enhance your website’s speed and efficiency.
Caching Options
Hostinger provides several caching options to improve load times.
- Browser Caching: Store static files on the user’s browser.
- Server Caching: Cache dynamic content on the server-side.
- Content Delivery Network (CDN): Use a CDN to distribute content globally.
Enable these caching options through Hostinger’s control panel. This will significantly boost your website’s performance.
Performance Monitoring
Regular monitoring helps maintain your website’s optimal performance.
| Tool | Function |
|---|---|
| Uptime Monitoring | Checks if your site is up and running. |
| Load Testing | Tests how your site handles traffic spikes. |
| Speed Tests | Measures your site’s load time. |
Hostinger offers these tools in the control panel. Use them to keep your website running smoothly.
Launching Your Website
Launching your website on Hostinger is an exciting step. With the right steps, you can make your site live quickly. Follow this guide for a smooth launch.
Final Checks
Before going live, conduct a final check. Ensure all pages load correctly. Verify all links work as expected. Check for spelling and grammar errors. Make sure your website looks good on mobile devices.
- Test all pages
- Verify links
- Correct errors
- Ensure mobile compatibility
Going Live
Now it’s time to make your website live. Follow these steps:
- Log in to your Hostinger account.
- Go to the hPanel dashboard.
- Click on Hosting and select your domain.
- Click on Manage and select Publish Website.
Wait for a few minutes. Your website will be live soon. Share your new site with friends and family. Celebrate your achievement!

Credit: www.youtube.com
Ongoing Maintenance
Keeping your website running smoothly on Hostinger involves ongoing maintenance. This ensures your site remains secure, fast, and up-to-date. Consistent care is crucial for optimal performance and user experience.
Regular Updates
Regular updates are vital for a healthy website. Always update your WordPress themes and plugins. This keeps your site secure from vulnerabilities. Hostinger’s control panel makes it easy to manage these updates. Navigate to the “Updates” section and check for available updates.
Enable automatic updates for core WordPress files. This ensures you get the latest security patches. Regular updates also improve your site’s functionality and performance. Set a monthly reminder to review and apply updates.
Backup Solutions
Backups are essential for data safety. Hostinger offers various backup solutions. Use the built-in backup feature in the control panel. Schedule daily or weekly backups to avoid data loss.
Consider using external backup plugins for added security. Popular options include UpdraftPlus and BackWPup. These plugins allow you to store backups on cloud services like Google Drive or Dropbox.
| Backup Solution | Frequency | Storage Options |
|---|---|---|
| Hostinger Built-in Backup | Daily/Weekly | Hostinger Server |
| UpdraftPlus | Custom | Google Drive, Dropbox |
| BackWPup | Custom | Amazon S3, FTP |
Create a backup before making significant changes to your site. This ensures you can restore it if something goes wrong. Always test your backup process to ensure it works correctly.
Frequently Asked Questions
How Do I Host My Website In Hostinger?
Sign up on Hostinger. Choose a hosting plan. Register a domain or use an existing one. Upload your website files via File Manager or FTP. Configure settings and go live.
How Much Does It Cost To Host A Website On Hostinger?
Hostinger’s website hosting plans start at $1. 99 per month. Prices vary based on features and plan duration.
Does Hostinger Include Hosting?
Yes, Hostinger includes web hosting services. They offer various plans, including shared, VPS, and cloud hosting options.
Is Hostinger Hosting Good Or Bad?
Hostinger offers reliable and affordable hosting services. It boasts excellent uptime, fast loading speeds, and helpful customer support. Users find its interface user-friendly. Hostinger is a good choice for both beginners and experienced users.
Conclusion
Hosting on Hostinger is simple and effective. With these steps, you can easily get your website online. Enjoy reliable hosting, excellent customer support, and affordable plans. Start today and see your website thrive. Hostinger is a great choice for both beginners and experienced webmasters.
Happy hosting!