
Hostinger does not offer a completely free hosting plan. You can use its 30-day money-back guarantee to try its services.
Hostinger is a popular web hosting provider known for its affordability and reliability. Although it doesn’t provide a free hosting plan, you can utilize its 30-day money-back guarantee to test its features. This allows you to experience their services without a long-term commitment.
Hostinger offers various hosting solutions, including shared hosting, VPS, and cloud hosting. Their user-friendly interface and excellent customer support make it a favorite among beginners and professionals. You can easily set up your website, manage domains, and access numerous tools to optimize your online presence. By taking advantage of the trial period, you can evaluate if Hostinger meets your website needs.
Getting Started
Hostinger offers a range of hosting services. You can start for free. This guide will help you get started quickly and efficiently. Follow these steps to create an account and choose the free plan.
Creating An Account
First, visit the Hostinger website. You will see a Sign Up button at the top right corner.
- Click the Sign Up button.
- Enter your email address and create a password.
- Click the Create Account button.
You can also sign up using your Google or Facebook account. This saves time and makes the process simpler.
Choosing The Free Plan
Once your account is created, you will need to choose a plan. Hostinger offers various plans, but you can start with the free one.
- Navigate to the Hosting Plans section.
- Select the Free Plan option.
- Click the Get Started button.
The free plan includes basic features. It is perfect for personal projects or small websites.
| Feature | Free Plan |
|---|---|
| Storage | 1 GB |
| Bandwidth | 100 GB |
| Email Accounts | 1 |
Now, you are ready to start building your website. The free plan gives you the tools you need.

Credit: www.youtube.com
Setting Up Your Domain
Setting up your domain is a crucial step in creating your online presence. With Hostinger, this process is simple and straightforward. We’ll guide you through selecting and connecting your domain.
Selecting A Domain Name
Your domain name is your website’s address. It should be easy to remember and relevant to your content.
- Keep it short: Short domain names are easier to remember.
- Use keywords: Include words related to your website’s content.
- Avoid numbers and hyphens: These can be confusing and hard to remember.
Once you’ve brainstormed a few ideas, check their availability. Hostinger’s domain checker tool makes this easy. Simply enter your desired name and see if it’s available.
Connecting Your Domain
After selecting your domain name, it’s time to connect it to your Hostinger account. Follow these steps:
- Log in: Access your Hostinger account.
- Go to the Control Panel: Navigate to the domain section.
- Select your domain: Choose the domain you want to connect.
- Update DNS settings: Enter the DNS details provided by Hostinger.
- Save changes: Confirm and save your updates.
It may take a few hours for the changes to take effect. Once done, your domain will be live and ready for use.
Building Your Website
Building your website on Hostinger can be an easy and cost-effective process. Hostinger offers tools to create stunning websites without any coding knowledge. In this section, you’ll learn how to use the website builder and install WordPress.
Using Website Builder
The Hostinger Website Builder is user-friendly and perfect for beginners. Follow these steps to build your site:
- Log in to your Hostinger account.
- Navigate to the Website Builder option.
- Choose a template that suits your needs.
- Customize the template using the drag-and-drop editor.
- Add text, images, and other elements to your site.
- Preview your site and make any final adjustments.
- Click Publish to make your site live.
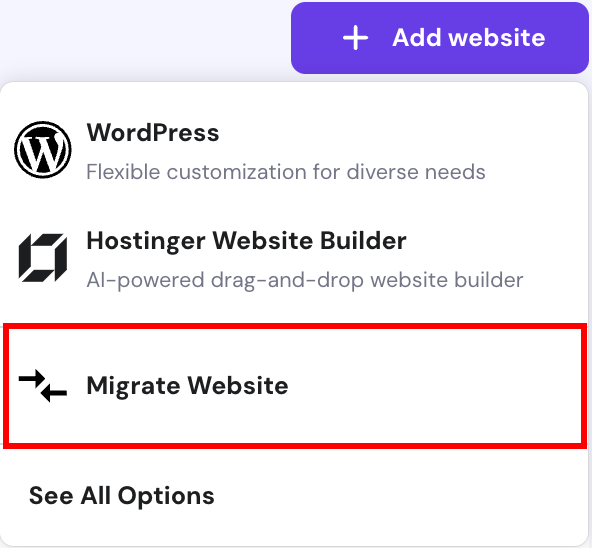
Installing WordPress
WordPress is a powerful platform for creating websites. Follow these steps to install WordPress on Hostinger:
- Log in to your Hostinger account.
- Go to the Control Panel.
- Find and click on the Auto Installer.
- Select WordPress from the list of applications.
- Fill in the required details such as your site name and admin credentials.
- Click Install and wait for the process to complete.
Once installed, you can log in to your WordPress dashboard. Here, you can select themes, install plugins, and customize your site.

Credit: m.youtube.com
Customizing Your Site
Creating a unique website on Hostinger is easy. You can customize your site to stand out. Use themes and plugins to give it a personal touch.
Choosing A Theme
Start by selecting a theme that fits your site’s purpose. Hostinger offers many free themes. To choose a theme:
- Log into your Hostinger dashboard.
- Go to the “Appearance” section.
- Click on “Themes”.
- Browse the available themes and pick one.
- Click “Activate” to apply the theme.
Look for a theme that is responsive and SEO-friendly. A responsive theme works well on all devices. An SEO-friendly theme helps your site rank better in search engines.
Adding Plugins
Plugins add extra features to your site. Hostinger offers many free plugins. To add plugins:
- Go to your dashboard and click on “Plugins”.
- Click “Add New”.
- Search for the plugin you need.
- Click “Install Now”.
- Activate the plugin after installation.
Some essential plugins include:
- Yoast SEO: Improves your site’s SEO.
- Contact Form 7: Adds contact forms easily.
- W3 Total Cache: Speeds up your website.
- Wordfence Security: Keeps your site secure.
Only install plugins you really need. Too many plugins can slow down your site. Always keep your plugins updated for best performance.
Adding Content
Adding content to your Hostinger website is simple and fun. This guide will help you create pages and write blog posts easily. Follow these steps to make your website shine.
Creating Pages
Pages are essential for any website. They provide information about your services or products. Here’s how to create pages on Hostinger:
- Login to your Hostinger account.
- Go to the Dashboard.
- Select Website from the menu.
- Click on Pages.
- Click the Add New Page button.
- Enter a Title for your page.
- Add Content using the editor.
- Click Publish to make it live.
Here are some tips for your pages:
- Use short paragraphs for easy reading.
- Add images to make it attractive.
- Include keywords to improve SEO.
Writing Blog Posts
Blog posts help keep your site fresh and engaging. Follow these steps to write a blog post:
- Login to your Hostinger account.
- Go to the Dashboard.
- Select Blog from the menu.
- Click on Add New Post.
- Enter a Title for your blog post.
- Write your content in the editor.
- Add images to make it interesting.
- Use headings to structure your content.
- Click Publish to make it live.
Here are some tips for your blog posts:
- Write in a conversational tone.
- Use bullet points for lists.
- Include internal links to other pages.
Optimizing Performance
Optimizing performance is crucial for a successful website. A fast website keeps visitors happy and improves SEO. Hostinger offers tools to enhance your site’s performance.
Speed Optimization
Website speed is important for user experience. Hostinger provides several features to boost speed.
- LiteSpeed Cache: This tool caches your pages, reducing load times.
- Content Delivery Network (CDN): A CDN stores your content in various locations. This ensures faster delivery to users worldwide.
- GZIP Compression: Compressing files makes them smaller and quicker to load.
- Image Optimization: Reduce image sizes without losing quality. This speeds up page load times.
Enable these features in your Hostinger dashboard. They significantly enhance site speed.
Seo Best Practices
Optimizing for search engines helps your site rank higher. Follow these SEO best practices on Hostinger.
- Keyword Research: Find relevant keywords for your content. Use tools like Google Keyword Planner.
- Meta Tags: Add meta titles and descriptions. They should include your main keywords.
- Alt Text: Use descriptive alt text for images. This improves your site’s accessibility and SEO.
- Internal Linking: Link to other pages on your site. This helps search engines understand your site structure.
- Mobile Optimization: Ensure your site is mobile-friendly. Use responsive design to improve user experience on all devices.
Implementing these practices will enhance your site’s SEO. Hostinger’s tools make it easy to follow these steps.
Securing Your Site
Securing your website is crucial. It protects your data and builds trust. Hostinger offers several tools to enhance your site’s security. Learn how to use Hostinger for free while keeping your site safe.
Setting Up Ssl
SSL certificates encrypt data between your site and its visitors. Hostinger provides free SSL certificates for all users.
- Log in to your Hostinger account.
- Navigate to the Hosting section.
- Click on Manage next to your domain.
- Select SSL from the menu.
- Click on Install SSL.
Your site will now have a secure connection. Visitors will see a padlock icon in the browser.
Regular Backups
Regular backups protect your data from accidental loss. Hostinger offers free daily backups.
| Step | Description |
|---|---|
| Step 1 | Log in to your Hostinger account. |
| Step 2 | Go to the Hosting section. |
| Step 3 | Click Manage next to your domain. |
| Step 4 | Select Backups from the menu. |
| Step 5 | Click Create Backup. |
Regular backups ensure you can restore your site. This is vital if anything goes wrong.
Monitoring And Analytics
Understanding your website’s performance is crucial. Hostinger provides tools to track visitors and analyze traffic. This helps you make data-driven decisions. Below, we explore these features in detail.
Tracking Visitors
Tracking visitors is essential. Hostinger offers built-in analytics tools. These tools help you understand who visits your site.
Here’s how to start:
- Log in to your Hostinger account.
- Navigate to the dashboard.
- Click on the “Analytics” tab.
In the “Analytics” tab, you will see:
- Number of Visitors: Shows how many people visit your site.
- Pages Visited: Displays which pages are popular.
- Session Duration: Indicates how long visitors stay.
Use this data to improve your content. Focus on popular pages and extend session duration.
Analyzing Traffic
Analyzing traffic helps you understand your audience. Hostinger provides detailed reports.
To analyze traffic, follow these steps:
- Go to the “Traffic Analysis” section in your dashboard.
- Select the date range for your report.
- Review the traffic sources.
Key metrics to watch include:
- Traffic Sources: Shows where your visitors come from.
- Referral Links: Indicates which sites link to you.
- Geographic Data: Displays visitor locations.
Use this information to optimize your marketing strategy. Focus on high-performing sources.
Credit: www.hostinger.com
Frequently Asked Questions
Can You Use Hostinger For Free?
Hostinger does not offer a free hosting plan. They provide affordable and reliable hosting services with various pricing tiers.
How To Use Hostinger Free Domain?
To use Hostinger’s free domain, sign up for a hosting plan. Select your domain during the registration process. Complete the setup by configuring DNS settings and pointing them to Hostinger servers. Manage your domain through the Hostinger control panel.
How Long Does Hostinger Free Domain Last?
Hostinger offers a free domain for the first year with their hosting plans. After that, renewal is required.
Is There A Way To Host A Website For Free?
Yes, you can host a website for free using platforms like GitHub Pages, WordPress. com, or Wix’s free plan.
Conclusion
Using Hostinger for free is a great way to start your online journey. You can test features and performance without spending a dime. This approach provides flexibility and ease for beginners. Hostinger offers reliable services even in their free version.
So, give it a try and see the benefits yourself!