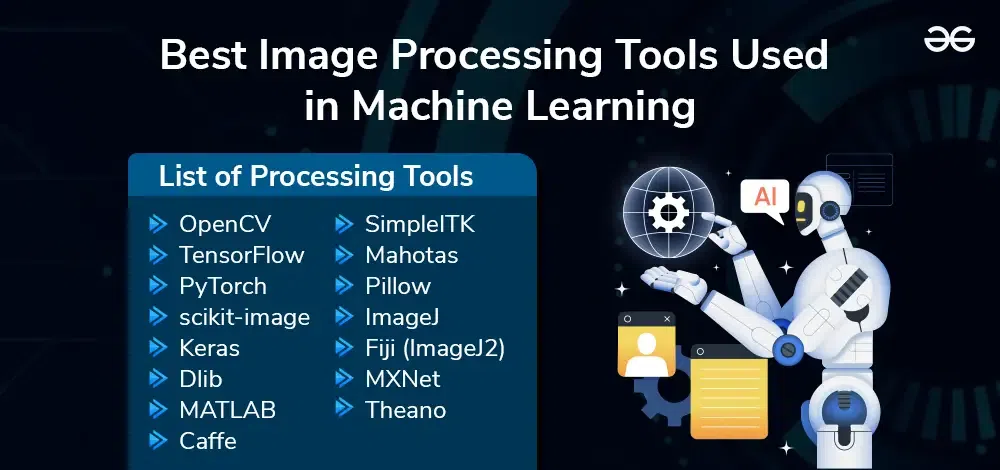
Grasshopper offers robust tools for image manipulation and processing. These tools enhance efficiency and accuracy in visual tasks.
Grasshopper’s tools for image manipulation and processing are essential for various industries. They provide powerful features for editing, transforming, and analyzing images. Users can easily adjust image properties, apply filters, and detect patterns. These tools are particularly beneficial for professionals in graphic design, engineering, and scientific research.
Grasshopper’s user-friendly interface ensures that even beginners can quickly learn to use its features. The software supports a wide range of image formats, making it versatile for different applications. By integrating Grasshopper tools into workflows, users can significantly improve productivity and achieve high-quality results.
Credit: stronghandtools.com
Introduction To Grasshopper For Image Manipulation
Grasshopper is revolutionizing how designers manipulate and process images. This blog post explores the basics and highlights the rise of algorithmic design in graphics.
What Is Grasshopper?
Grasshopper is a visual programming language. It integrates with Rhinoceros 3D CAD software. Users create and edit complex forms using simple graphic elements called nodes. These nodes represent different functions and commands. Connecting nodes builds a visual script, transforming images in innovative ways.
The Rise Of Algorithmic Design In Graphics
Algorithmic design is changing the graphics industry. Designers use algorithms to generate complex patterns and effects. This is more efficient than manual methods. Grasshopper plays a key role in this shift. It allows designers to experiment with different algorithms easily.
Here are some key advantages of using Grasshopper:
- Flexibility: Create unique designs with customizable parameters.
- Efficiency: Automate repetitive tasks and save time.
- Precision: Achieve high levels of detail and accuracy.
Grasshopper’s user-friendly interface makes it accessible to beginners. At the same time, its advanced features satisfy experienced designers. This balance contributes to its growing popularity.
| Feature | Description |
|---|---|
| Node-Based System | Connect nodes to create visual scripts. |
| Integration with Rhino | Seamlessly work within Rhinoceros 3D. |
| Customizable Algorithms | Create and modify algorithms to fit your needs. |
Grasshopper is more than just a tool. It’s a powerful platform for innovation in image manipulation and processing.

Credit: discourse.mcneel.com
Getting Started With Grasshopper
Grasshopper is a powerful tool for image manipulation and processing. It is a visual programming language that runs within Rhino’s 3D modeling environment. You can use Grasshopper to create complex algorithms without writing traditional code.
Installing And Setting Up
To start using Grasshopper, you need to install Rhino. Follow these steps to get started:
- Download Rhino from the official website.
- Install Rhino on your computer.
- Launch Rhino and type
Grasshopperin the command line. - Press
Enterto open Grasshopper.
Once Grasshopper is open, you can start creating and manipulating images.
Basic Components And Interface
The Grasshopper interface consists of several key components:
- Canvas: This is where you create your algorithms.
- Tabs: These contain different sets of tools and components.
- Parameters: These are the inputs and outputs of your algorithms.
- Components: These perform specific functions, like image processing tasks.
To use Grasshopper effectively, familiarize yourself with these basic components.
Let’s create a simple image manipulation algorithm:
- Drag an Image Sampler component onto the canvas.
- Connect it to an Image Export component.
- Adjust the settings to manipulate the image.
This basic setup will help you understand how Grasshopper works.
Experiment with different components to see their effects. Grasshopper offers a wide range of tools for image processing. Take your time to explore and learn. Happy creating!
Fundamental Concepts Of Image Processing
Image processing is essential for digital images. It helps in enhancing and manipulating images. Understanding the fundamental concepts is crucial for effective image processing.
Pixels, Color Models, And Resolution
Pixels are the smallest units of an image. Each pixel represents a single point in the image. The clarity of an image depends on the number of pixels.
Color Models define how colors are represented in an image. Common color models include RGB, CMYK, and HSV. The RGB model stands for Red, Green, and Blue. It is used for digital screens. The CMYK model stands for Cyan, Magenta, Yellow, and Key (Black). It is used for printing. The HSV model stands for Hue, Saturation, and Value. It is used in various image editing software.
Resolution refers to the number of pixels in an image. Higher resolution means more detail. It is usually measured in pixels per inch (PPI).
Image Formats And Their Uses
Different image formats serve different purposes. Here are some common formats:
- JPEG: Used for photographs and web images. It supports millions of colors.
- PNG: Supports transparency. Used for web graphics and logos.
- GIF: Supports animation. Limited to 256 colors.
- BMP: Uncompressed format. High quality but large file size.
- TIFF: Used in printing. Supports lossless compression.
Each format has its unique characteristics. Choose the format based on your needs.
Essential Grasshopper Tools For Editing Images
Grasshopper is a powerful tool for image manipulation and processing. It provides a range of essential tools for editing images effectively. Whether you need to adjust colors or apply transformations, Grasshopper has got you covered.
Color Adjustment Tools
Color adjustments can make images look vibrant and appealing. Grasshopper offers various tools to tweak colors in your images.
- Color Balance: Adjust the balance of red, green, and blue in your image.
- Brightness/Contrast: Modify the brightness and contrast to enhance image details.
- Hue/Saturation: Change the hue and saturation to achieve the desired color tone.
- Grayscale: Convert your image to black and white for a classic look.
Transformations And Filters
Transformations and filters help in reshaping and enhancing your images. Here are some useful Grasshopper tools for this purpose:
| Transformation | Description |
|---|---|
| Resize | Change the dimensions of your image. |
| Rotate | Rotate the image to the desired angle. |
| Crop | Remove unwanted parts from the image. |
Filters add special effects to your images. Some popular Grasshopper filters include:
- Blur: Softens the image for a smooth effect.
- Sharpen: Enhances the edges to make the image clearer.
- Emboss: Gives a 3D effect to the image.
- Sepia: Adds a warm, brown tone for a vintage look.
These tools and filters make Grasshopper a versatile choice for image editing. Enjoy exploring and enhancing your images with these powerful features.
Advanced Techniques In Grasshopper
Grasshopper offers powerful tools for image manipulation. These advanced techniques can enhance your designs. From creating custom scripts to integrating with other software, Grasshopper provides flexibility.
Creating Custom Scripts For Effects
With Grasshopper, you can create custom scripts. These scripts apply unique effects to images. Use simple code to transform your visuals.
Here is a basic example of a Grasshopper script:
private void RunScript(Bitmap bitmap, ref object A)
{
    // Loop through pixels
    for (int y = 0; y < bitmap.Height; y++)
    {
        for (int x = 0; x < bitmap.Width; x++)
        {
            Color pixelColor = bitmap.GetPixel(x, y);
            // Apply an effect
            Color newColor = Color.FromArgb(pixelColor.R, 0, 0);
            bitmap.SetPixel(x, y, newColor);
        }
    }
    A = bitmap;
}
With this script, all red shades in an image are enhanced. Experiment with different effects to create unique visuals.
Integration With Other Software
Grasshopper integrates well with other software. Connect with tools like Photoshop or Illustrator. This allows for seamless workflows.
Here are some popular integrations:
- Adobe Photoshop: Export Grasshopper designs to Photoshop for further editing.
- Illustrator: Use Grasshopper to create vector graphics for Illustrator.
- 3D Modeling Software: Combine Grasshopper with Rhino for 3D modeling.
These integrations enhance your creative process. Use Grasshopper alongside other tools for better results.
Automation Of Image Editing With Grasshopper
Grasshopper is a powerful tool for automating image editing tasks. It helps streamline the process, saving time and ensuring consistency. By leveraging Grasshopper’s capabilities, you can handle large volumes of images with ease and precision. This makes it a go-to solution for anyone who deals with image manipulation regularly.
Batch Processing Techniques
Batch processing is a game-changer in image editing. Grasshopper allows you to apply the same edits to multiple images simultaneously. This is particularly useful for professionals who need to edit large sets of images.
Here’s how you can set up batch processing in Grasshopper:
- Load your images into the Grasshopper environment.
- Define the editing operations you want to apply.
- Execute the batch process to apply edits to all images.
Batch processing ensures that all your images have a uniform look. This consistency is crucial for branding and professional presentations.
Automating Repetitive Tasks
Repetitive tasks can be tedious and time-consuming. Grasshopper excels at automating these tasks, freeing up your time for more creative work.
Common repetitive tasks include:
- Resizing images
- Applying filters
- Adjusting brightness and contrast
With Grasshopper, you can create scripts to automate these tasks. This ensures that every image meets your standards without manual intervention.
Here is a simple script example:
import grasshopper as gh

# Load images
images = gh.load_images('path/to/images')

# Define operations
def edit_image(image):
    image.resize(800, 600)
    image.adjust_brightness(20)
    image.apply_filter('sepia')
    return image

# Apply operations
edited_images = [edit_image(img) for img in images]

# Save edited images
gh.save_images(edited_images, 'path/to/save')
By automating these tasks, you can focus on more important aspects of your work. This increases your productivity and ensures higher quality output.
Practical Applications And Case Studies
Grasshopper tools are powerful for image manipulation and processing. These tools help professionals create stunning visuals. This section covers practical applications and case studies.
Architectural Visualization Enhancements
Architects use Grasshopper tools to enhance building designs. They create realistic renderings of future structures. These tools help in visualizing complex architectural details.
For instance, Grasshopper can generate detailed facade patterns. This helps in understanding light and shadow effects. Architects can also simulate different environmental conditions.
Consider a case study of a modern skyscraper. The design team used Grasshopper for the facade. They tested various patterns and materials. This ensured the best aesthetic and functional outcome.
Another example is urban planning. Grasshopper helps visualize large-scale developments. This includes parks, buildings, and infrastructure. Planners can adjust designs quickly based on feedback.
Graphic Design Projects
Graphic designers benefit greatly from Grasshopper tools. They can create intricate designs with ease. These tools offer flexibility and precision.
In a recent project, a designer created a complex logo. Grasshopper allowed precise control over shapes and colors. The final logo was unique and visually striking.
Grasshopper also helps in creating digital art. Artists can experiment with different styles and effects. This results in innovative and captivating artworks.
Consider a case study in advertising. A designer used Grasshopper to create a billboard. The design was dynamic and attention-grabbing. The client saw an increase in engagement and sales.
| Application | Benefit |
|---|---|
| Architectural Visualization | Realistic renderings and environmental simulations |
| Graphic Design | Precise control and innovative designs |
Grasshopper tools are invaluable for professionals. They enhance creativity and efficiency. These tools transform ideas into reality.
Tips And Best Practices
Using Grasshopper tools for image manipulation and processing can be very rewarding. This section will provide useful tips and best practices to enhance your workflow and skills.
Optimizing Workflow In Grasshopper
Efficiency is key in any image processing task. Here are some tips to optimize your workflow:
- Use Shortcuts: Familiarize yourself with keyboard shortcuts for common actions.
- Organize Components: Group and label components to keep your workspace tidy.
- Use Data Trees: Utilize data trees to manage complex data structures effectively.
- Automate Repetitive Tasks: Create custom scripts to automate repetitive tasks.
- Optimize Performance: Simplify geometries and reduce the number of components to improve performance.
Resources For Learning And Inspiration
Continuous learning is essential to mastering Grasshopper tools. Here are some valuable resources:
| Resource | Description |
|---|---|
| Grasshopper Primer | An extensive guide for beginners and advanced users. |
| Online Tutorials | Video tutorials on platforms like YouTube and Vimeo. |
| Forums and Communities | Join forums like Grasshopper3D to share knowledge and solve problems. |
| Workshops and Webinars | Attend workshops and webinars to learn from experts. |
| Books and eBooks | Read books and eBooks specifically about Grasshopper. |
Leverage these resources to stay updated and find inspiration for your projects. By following these tips and best practices, you can become proficient in using Grasshopper tools for image manipulation and processing.
Future Of Image Manipulation With Grasshopper
The future of image manipulation with Grasshopper is fascinating. Grasshopper is a powerful tool for visual programming. It helps artists and designers create stunning images. The tool keeps evolving with new features. Let’s explore the emerging trends and tools shaping its future.
Emerging Trends And Tools
Several emerging trends are shaping Grasshopper’s future. Artificial intelligence (AI) and machine learning (ML) are game-changers. These technologies make image manipulation smarter and faster.
Real-time rendering is another significant trend. It allows users to see changes instantly. This speeds up the design process.
3D modeling is also becoming more popular. Grasshopper supports advanced 3D tools. These tools help create more complex and detailed images.
Here is a table of emerging tools and their features:
| Tool | Feature |
|---|---|
| AI Integration | Automates repetitive tasks |
| Real-time Rendering | Instant feedback |
| 3D Modeling | Detailed image creation |
Community Contributions And Plugins
The Grasshopper community is highly active. Many users contribute plugins and scripts. These contributions enhance Grasshopper’s capabilities.
Popular plugins include:
- Kangaroo – Physics simulation
- Ladybug – Environmental analysis
- Weaverbird – Mesh editing
Community forums are a great resource. Users share their projects and ideas. This helps everyone learn and grow.
Grasshopper’s future looks bright with these trends and community efforts. Stay tuned for more exciting developments!
Credit: medium.com
Frequently Asked Questions
What Is A Grasshopper Tool?
A grasshopper tool is a visual programming language plugin for Rhino 3D. It helps create complex 3D designs easily.
What Is The Difference Between Rhino And Grasshopper?
Rhino is a 3D modeling software used for designing complex shapes. Grasshopper is a visual programming plugin for Rhino that automates design tasks.
Is Grasshopper Easy To Learn?
Yes, Grasshopper is easy to learn. It offers a user-friendly interface and many online tutorials. Beginners can quickly grasp its basics.
Why Is Grasshopper Used?
Grasshopper is used for parametric design and automation. It helps create complex geometries and streamline design processes efficiently.
Conclusion
Grasshopper tools offer powerful options for image manipulation and processing. They streamline complex tasks, making them accessible to all. Enhance your projects with these versatile tools. Explore their full potential and elevate your design capabilities. Start experimenting today and see the difference Grasshopper can make.