To edit an AI file in Photoshop, first open the file using Photoshop. Then, rasterize the layers for editing.
Editing AI files in Photoshop can be a straightforward process. Adobe Illustrator (AI) files are vector-based, while Photoshop works with raster graphics. Opening an AI file in Photoshop allows you to convert vector elements into raster layers. This conversion enables detailed editing and manipulation, leveraging Photoshop’s powerful tools.
Ensure you have the latest versions of both Adobe Illustrator and Photoshop for compatibility. Rasterizing the layers is essential for maintaining image quality and enabling pixel-level edits. This guide will help you navigate the steps to achieve seamless AI file editing within Photoshop, enhancing your design workflow.
Credit: www.psdvault.com
Introduction To Ai Files And Photoshop
Editing AI files in Photoshop can be simple. Adobe Illustrator files, or AI files, are common for vector graphics. Photoshop, another Adobe product, can handle these files too. Let’s explore how.
What Is An Ai File?
An AI file is a vector graphic file. Adobe Illustrator creates and edits these files. They are scalable without losing quality. This makes them ideal for logos and icons.
Photoshop’s Compatibility With Vector Graphics
Photoshop can open and edit AI files. But, it treats them as raster images. This means they lose their vector properties. You can still make edits but with some limitations.
To open an AI file in Photoshop:
- Launch Photoshop.
- Select File > Open.
- Choose your AI file.
- Click OK to rasterize the file.
To retain some vector properties, you can use Smart Objects. This allows for non-destructive editing.
Remember:
- AI files are best edited in Illustrator.
- Photoshop is great for raster edits and effects.
Preparing To Edit Ai Files
Editing AI files in Photoshop can seem complex. With the right preparation, it becomes a straightforward task. This section will guide you through the necessary steps to prepare for editing AI files. We will cover software requirements and understanding file formats.
Software Requirements
To edit AI files in Photoshop, you need specific software. Here is a table listing the software requirements:
| Software | Version |
|---|---|
| Adobe Photoshop | CS6 or later |
| Adobe Illustrator | CS6 or later |
Ensure you have the latest versions of Photoshop and Illustrator. They offer better compatibility with AI files.
Understanding File Formats
AI files are native to Adobe Illustrator. They are vector-based files. This format is different from Photoshop’s raster-based files. Understanding these differences is crucial for editing.
- Vector files use mathematical equations to create images.
- Raster files use pixels to create images.
When you open an AI file in Photoshop, it converts to a raster format. This conversion can affect the image quality. It’s essential to be aware of this change.
- Open Adobe Illustrator.
- Save the AI file as a PDF.
- Open the PDF in Photoshop.
- Edit and save your work.
Follow these steps to maintain the best quality while editing. Preparing properly ensures a smooth editing process.
Opening Ai Files In Photoshop
Adobe Illustrator (AI) files are vector-based graphics. Photoshop is a raster graphics editor. Sometimes, you may need to edit AI files in Photoshop. This guide will help you achieve that. Follow these steps to open AI files in Photoshop seamlessly.
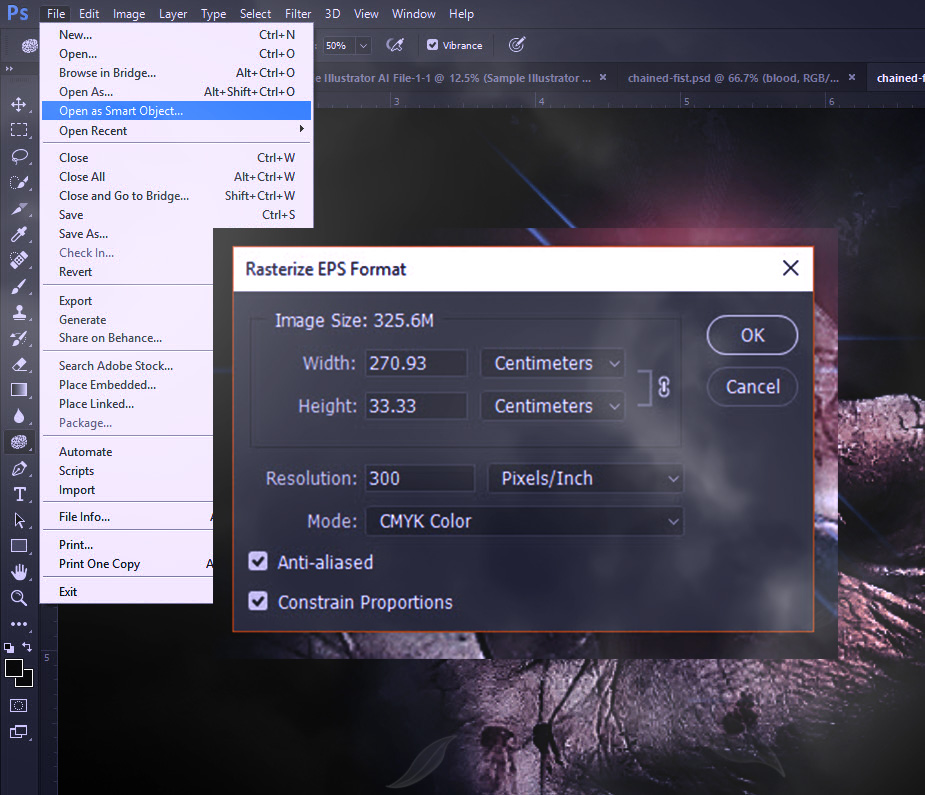
Using ‘open As’ Function
To open an AI file in Photoshop, use the ‘Open As’ function. Here’s how:
- Launch Photoshop.
- Go to File in the top menu.
- Select Open As.
- Navigate to your AI file location.
- Choose the AI file.
- Select Photoshop from the Open As drop-down menu.
- Click Open.
Using ‘Open As’ ensures that the file opens correctly. It converts the vector to raster format. You can then edit it as needed.
Importing Ai Layers Into Photoshop
Sometimes, you need to retain layers from AI files. Photoshop can import AI layers. Follow these steps:
- Open Illustrator and your AI file.
- Ensure all layers are visible and properly named.
- Save the AI file.
- In Photoshop, go to File > Open.
- Select the AI file.
- A dialog box appears. Choose Convert Layers to Objects.
- Click OK.
Photoshop imports the AI file with layers intact. You can then edit each layer individually. This method is ideal for complex graphics.
Editing AI files in Photoshop opens up various creative possibilities. You can blend vector graphics with raster effects seamlessly.
Credit: community.adobe.com
Rasterization Of Vector Graphics
Editing AI files in Photoshop often involves rasterizing vector graphics. Rasterization converts vector images into pixel-based images. This step is crucial to apply Photoshop’s powerful editing tools.
What Is Rasterization?
Rasterization is the process of converting vector graphics into raster images. Vector graphics use mathematical equations to represent images. Raster images, however, consist of pixels. Each pixel has a specific color value.
In Photoshop, you can easily rasterize vector graphics. This allows for detailed editing. Yet, it changes the image’s scalability.
Pros And Cons Of Rasterizing
| Pros | Cons |
|---|---|
|
|
Rasterizing has both advantages and disadvantages. It allows for detailed edits but impacts scalability.
Editing Ai Layers In Photoshop
Editing AI files in Photoshop can be a game-changer for designers. AI files are Adobe Illustrator files. They are often used for vector graphics. Photoshop can edit these files, but it handles them differently. Understanding how to edit AI layers in Photoshop can help you create stunning designs. This section will guide you through the process step-by-step.
Adjusting Layer Properties
Layers are the building blocks of any design in Photoshop. To edit AI layers, you need to adjust their properties. Start by opening your AI file in Photoshop. You will see each vector as a separate layer. Click on the layer you want to edit. The Properties Panel will show various options.
You can change the opacity to make the layer more transparent. Use the Blend Mode to mix colors in creative ways. Adjust the Fill to change the color inside the shape. These options give you control over each layer.
Using Photoshop Tools On Vector Layers
Photoshop offers many tools to edit vector layers. The Move Tool allows you to reposition layers. Select the Move Tool from the toolbar. Click and drag your layer to a new spot.
The Pen Tool is another powerful feature. It lets you draw and modify paths. Select the Pen Tool and click on your vector layer. You can add points and adjust curves easily.
Using the Brush Tool can also enhance your vector layers. Choose a brush style and paint directly on the layer. This adds texture and depth to your design. Don’t forget to use the Eraser Tool if you make a mistake. It helps to clean up any unwanted areas.
Here is a table summarizing the tools and their functions:
| Tool | Function |
|---|---|
| Move Tool | Reposition layers |
| Pen Tool | Draw and modify paths |
| Brush Tool | Add texture and depth |
| Eraser Tool | Clean up unwanted areas |
Remember to save your work often. Editing AI files in Photoshop can be fun and rewarding. With these tools, your designs will stand out.
Maintaining Vector Quality
Editing an AI file in Photoshop can be tricky. It is important to maintain vector quality. Vectors are scalable graphics. They do not lose clarity. Learn how to keep them sharp in Photoshop.
Working With Smart Objects
Smart Objects help keep vector quality. To use them, follow these steps:
- Open the AI file in Photoshop.
- Select the layer.
- Right-click and choose Convert to Smart Object.
Smart Objects preserve the original vector data. This prevents loss of quality.
Scaling And Transformations
Scaling can affect vector quality. Here is how to do it right:
- Press Ctrl+T (Command+T on Mac) to transform.
- Hold the Shift key to scale proportionally.
- Use the corner handles to resize.
Transformations can distort vectors. Smart Objects help keep the original quality.
Always use Smart Objects. They ensure your vectors stay sharp. This is crucial for high-quality designs.
Exporting Edited Files
Editing AI files in Photoshop is just the beginning. Once you’re done, the next step is exporting the edited files. Proper exporting ensures your work looks great on any platform. Let’s dive into the essentials of exporting your edited files.
Choosing The Right File Format
Choosing the correct file format is crucial. Different formats serve different purposes. Here’s a quick guide:
| Format | Best For |
|---|---|
| JPEG | Photos and web images |
| PNG | Web graphics and images with transparency |
| TIFF | High-quality prints |
| PSD | Editable Photoshop files |
Saving For Web
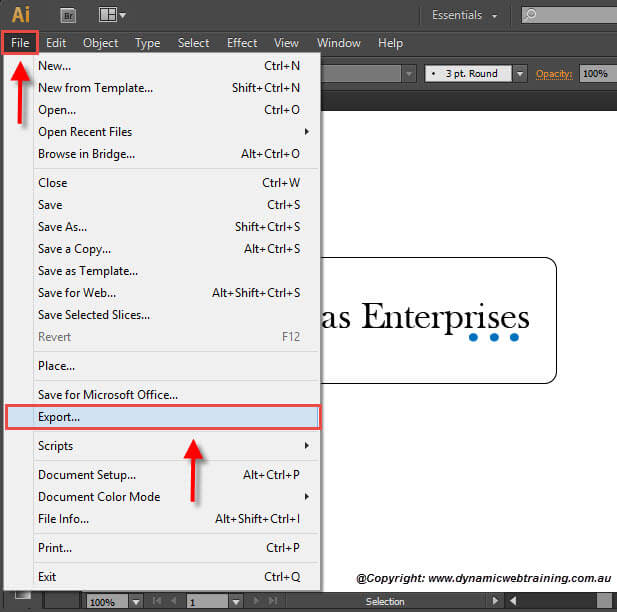
Saving for web ensures fast loading times. Follow these steps:
- Go to File > Export > Save for Web (Legacy).
- Choose the format, like JPEG or PNG.
- Adjust the quality settings. Keep the balance between quality and size.
- Click Save and choose your destination folder.
Saving For Print
Saving for print needs higher quality. Here’s how to do it:
- Go to File > Save As.
- Choose a high-quality format, like TIFF or PDF.
- Ensure your resolution is at least 300 DPI.
- Click Save and confirm the settings.
Tips And Tricks For A Smooth Workflow
Editing AI files in Photoshop can be challenging. With the right tips and tricks, you can achieve a smooth workflow. This section covers essential tips to streamline your editing process.
Keyboard Shortcuts For Efficiency
Using keyboard shortcuts can save you time. Here are some essential shortcuts:
- Ctrl + T: Transform tool
- Ctrl + J: Duplicate layer
- Ctrl + Z: Undo last action
- Ctrl + Shift + S: Save As
- Ctrl + E: Merge layers
Remember these shortcuts. They will help you work faster.
Avoiding Common Pitfalls
To avoid common mistakes, follow these guidelines:
- Check your layers. Make sure you are editing the correct layer.
- Save regularly. Always save your work to prevent data loss.
- Use high resolution. Ensure your AI file is high resolution.
- Organize your layers. Name and group layers for easy navigation.
- Adjust the artboard size. Match your artboard size with your project needs.
Following these tips will help you avoid common pitfalls.
Advanced Techniques
Editing AI files in Photoshop goes beyond basic adjustments. Advanced techniques allow for more creative control. These methods help you achieve professional results. Learn how to master clipping masks and non-destructive filters.
Creating Clipping Masks With Ai Files
Clipping masks are essential for professional designs. They allow you to control where your artwork appears. Here’s how to create a clipping mask with an AI file in Photoshop:
- Open your AI file in Photoshop.
- Select the layer you want to mask.
- Right-click the layer and choose Create Clipping Mask.
- Adjust the mask to fit your needs.
Clipping masks help you focus on specific parts of your design. You can make adjustments without altering the original file. This keeps your workflow non-destructive.
Applying Non-destructive Filters
Non-destructive filters allow you to edit without changing the original file. This technique is great for experimentation. Follow these steps to apply non-destructive filters:
- Convert your AI layer to a Smart Object.
- Select the Filter menu.
- Choose the filter you want to apply.
- Adjust the filter settings as needed.
Using Smart Objects ensures your original artwork remains intact. You can revert or tweak filters anytime. This method offers flexibility and precision.
Advanced techniques like clipping masks and non-destructive filters enhance your design process. They provide control and flexibility, ensuring high-quality results.
Troubleshooting Common Issues
Editing AI files in Photoshop can sometimes bring unexpected challenges. Here are common issues and solutions.
Handling Compatibility Errors
Compatibility issues occur when opening AI files in Photoshop.
Ensure you have the latest version of Photoshop. Older versions may not support newer AI files.
Check if the AI file was created with an older version of Illustrator. Save the file in a compatible format.
Tip: Save AI files as PDFs. Photoshop handles PDF files better.
Resolving Rasterization Problems
Rasterization converts vector images to raster images. This can cause quality loss.
Open the AI file in Illustrator. Export the file as a high-resolution image, such as PNG or TIFF.
Import the high-resolution image into Photoshop. This preserves quality.
Tip: Use the Smart Object feature in Photoshop. It helps maintain quality.
| Issue | Solution |
|---|---|
| Compatibility Errors | Update Photoshop, Save AI as PDF |
| Rasterization Problems | Export as high-res image, Use Smart Object |
Follow these tips to handle common issues when editing AI files in Photoshop.
Credit: www.dynamicwebtraining.com.au
Frequently Asked Questions
Can I Edit An Illustrator File In Photoshop?
Yes, you can edit an Illustrator file in Photoshop. Save the file as a PDF or PSD first.
How Do I Edit An Ai Image In Photoshop?
Open the AI image in Photoshop. Use tools like the Brush, Clone Stamp, and Healing Brush to edit. Save changes.
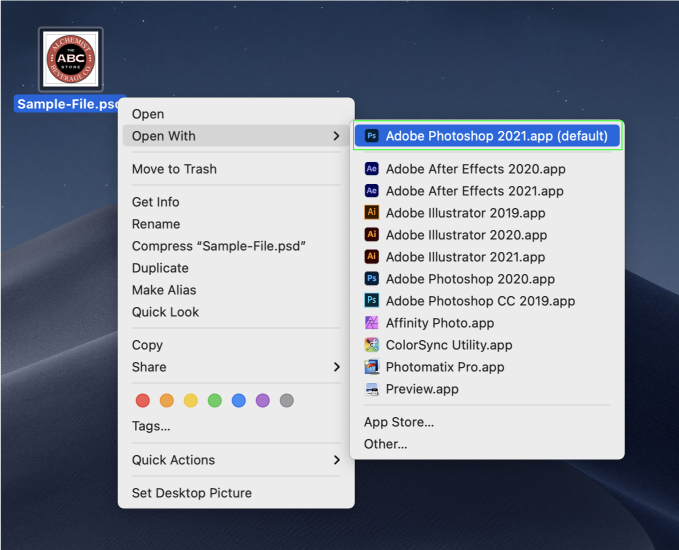
Can I Open An Ai File In Photoshop?
Yes, you can open an AI file in Photoshop. Use the “File” menu, then “Open” or drag and drop the file.
Can An Ai File Be Edited?
Yes, an AI file can be edited. Use Adobe Illustrator or compatible software to make changes easily.
Conclusion
Editing AI files in Photoshop is straightforward with the right approach. Follow the steps outlined, and you’ll manage AI files efficiently. Mastering this skill enhances your design flexibility. Keep practicing to become more proficient. Enjoy the creative possibilities that combining Illustrator and Photoshop brings to your projects.