If you’re using GetResponse to power your email marketing, setting up your SPF record correctly is a must. Why?
Because without it, your emails might land in spam or get blocked altogether. You want your messages to reach your audience’s inbox every time, right? Luckily, adding an SPF record for your domain in GetResponse isn’t as tricky as it sounds.
In this guide, you’ll learn exactly how to do it step-by-step, even if you’re not a tech expert. Keep reading, and you’ll secure your email reputation and boost your campaign’s success with just a few simple moves.
Why Spf Matters
SPF, or Sender Policy Framework, plays a key role in email security. It tells email servers which senders are allowed to send emails on behalf of your domain. This simple step helps protect your email reputation and ensures your messages reach the inbox.
Without SPF, emails might be flagged as spam or rejected. Setting up an SPF record for your domain is essential for smooth email delivery, especially when using services like GetResponse.
Impact On Email Delivery
SPF helps email servers verify your messages’ authenticity. If your SPF record is correct, email providers trust your emails more. This trust lowers the chance that your emails will go to the spam folder.
Without an SPF record, some servers may block your emails. This leads to fewer customers seeing your messages and reduces engagement. Proper SPF setup improves your email open rates and overall communication.
Preventing Email Spoofing
Email spoofing is when someone sends fake emails pretending to be you. Spoofed emails can harm your brand and trick your contacts.
SPF blocks unauthorized senders by checking the source of each email. If the sender is not on your SPF list, the email can be rejected or marked as suspicious. This stops scammers and protects your domain from misuse.
Using SPF makes your emails more secure and builds trust with your audience.
Preparing Your Domain
Preparing your domain is the first step to setting up your GetResponse SPF record. This process ensures your emails are trusted and reach inboxes, not spam folders. Proper preparation helps protect your domain’s reputation and improves email deliverability.
Before adding the SPF record, you need access to your domain’s DNS settings. These settings control how your domain handles email and other services. Knowing your domain host is essential to find these settings quickly and make changes.
Accessing Dns Settings
Log in to your domain host’s control panel to access DNS settings. This area is often labeled as DNS Management or Zone Editor. You will use this section to add or modify DNS records, including your SPF record.
Look for options like “Manage DNS,” “DNS Settings,” or “DNS Zone File.” These terms vary by provider but lead to the same place. Once inside, you can create a new TXT record for your SPF configuration.
Identifying Domain Host
Find out where your domain is registered or hosted. This is usually the company where you bought your domain name. Common hosts include GoDaddy, Namecheap, or Bluehost.
If unsure, use a WHOIS lookup tool to see your domain’s registrar. This tool shows detailed information about your domain provider. Knowing your host helps you log in correctly to update DNS records.
Creating The Spf Record
Creating an SPF record is a key step to protect your domain from email spoofing. This record tells mail servers which senders are allowed to send emails on your behalf. Setting it up correctly helps your emails avoid spam filters and reach the inbox.
To create the SPF record, you need to add a TXT record to your domain’s DNS settings. This process involves selecting the correct record type and formatting the SPF string properly. Follow each step carefully for effective email authentication.
Choosing Txt Record Type
Start by logging into your domain provider’s control panel. Find the DNS management or zone editor section. Here, select the option to add a new record.
Choose TXT as the record type. SPF records use the TXT type because it allows you to add text data to your DNS. Do not select other record types like A or CNAME for SPF.
For the host or name field, enter @ or leave it blank. This usually points the record to your root domain. Check your provider’s instructions for exact requirements.
Formatting The Spf String
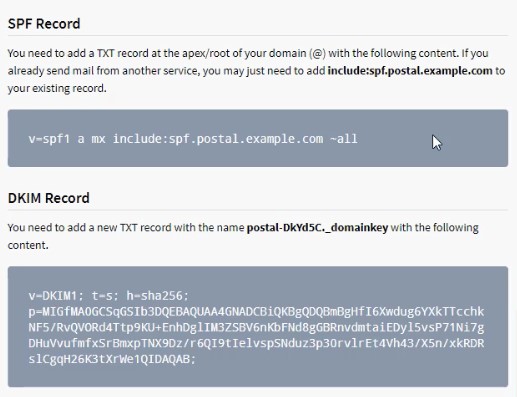
The SPF string defines which servers can send emails for your domain. It starts with v=spf1, which tells mail servers this is an SPF record.
Next, add the authorized senders. For GetResponse, include their servers using include:getresponse.com. This means you allow GetResponse to send emails for you.
End the string with -all. This tells receivers to reject emails not from listed servers. A full example looks like this:
Only one SPF record should exist per domain. If you have an existing record, merge the new data into it instead of creating a second one.
Adding Getresponse To Spf
Adding GetResponse to your SPF record helps improve email delivery and prevent spoofing. SPF records tell mail servers which sources can send emails for your domain. Including GetResponse in your SPF allows their servers to send emails on your behalf.
This step is important if you use GetResponse for email marketing or newsletters. Without the correct SPF entry, your emails may be marked as spam or rejected.
Getresponse Spf Syntax
The GetResponse SPF syntax looks like this:
This means you allow GetResponse’s servers to send emails for your domain. You add this syntax inside your domain’s SPF record, which is a TXT record in your DNS settings.
Combining With Existing Records
You can only have one SPF record per domain. If you already have one, combine the GetResponse syntax into it.
For example, if your current SPF is:
Add GetResponse by changing it to:
Remember to keep the record under 255 characters and end with ~all or -all.
After updating, save your DNS settings and wait for them to propagate. This can take up to 48 hours.
Publishing The Record
Publishing the SPF record is a crucial step to ensure your emails pass authentication checks. This process involves adding the SPF record to your domain’s DNS settings. Proper publishing helps mail servers verify your email sources. It protects your domain from spoofing and improves email delivery rates.
After generating the correct SPF record for GetResponse, you must add it carefully in the DNS manager. Follow your domain host’s instructions for editing DNS records. This step activates the SPF rules for your domain, allowing receiving servers to validate emails sent via GetResponse on your behalf.
Saving Changes In Dns
Once you add the SPF record, save the DNS changes immediately. Look for buttons like “Save,” “Apply,” or “Add Record.” Without saving, your changes won’t take effect. It might take a few minutes for your DNS host to confirm the update.
Double-check the SPF record before saving. Incorrect syntax can cause email delivery issues. Ensure your record starts with v=spf1 and includes the right GetResponse servers.
Ttl Settings Explained
TTL stands for Time To Live. It tells DNS servers how long to cache your SPF record. You can set TTL in seconds, minutes, or hours.
A shorter TTL means changes update faster but cause more DNS traffic. A longer TTL reduces traffic but slows down updates. A common TTL value is 3600 seconds (1 hour).
Choose a TTL that fits your needs. For initial setup, a shorter TTL helps test changes quickly. Later, you can increase it for stability.

Credit: glockapps.com
Testing Your Spf Setup
Testing your SPF setup is a crucial step after adding the SPF record for your domain. It ensures that your email servers are authorized to send emails on behalf of your domain. This helps prevent your emails from being marked as spam or rejected by recipient servers. Proper testing confirms that your SPF record is correctly configured and working as expected.
Many tools and methods exist to verify your SPF record. These tools check the syntax and validate the servers listed in your SPF record. Testing also helps identify any errors or misconfigurations. Catching these issues early improves your email deliverability and protects your domain reputation.
Using Online Spf Validators
Online SPF validators are easy to use and free. Enter your domain name or SPF record in the validator tool. The tool analyzes the SPF record and shows if it is valid or contains errors. It also provides details about each part of the record.
Popular SPF validators include MXToolbox, Kitterman, and SPF Record Check. These sites give clear feedback and suggest fixes for common problems. Using an online validator saves time and avoids manual mistakes.
Troubleshooting Common Issues
Common SPF issues include syntax errors, multiple SPF records, or missing include statements. A syntax error can cause the entire SPF record to fail. Use quotes and spaces correctly in the TXT record.
Only one SPF record should exist per domain. If there are two, merge them into one to avoid conflicts. Also, ensure your SPF includes all services that send mail for your domain, such as GetResponse.
DNS propagation delay may cause temporary test failures. Wait a few hours and test again. Check for typos in domain names and IP addresses. Correct these issues to ensure smooth email delivery.
Maintaining Spf Records
Maintaining SPF records is key to keeping your email safe and trusted. It helps stop fake emails and prevents your messages from going to spam. Proper care of SPF records ensures smooth email delivery and protects your domain’s reputation.
SPF records need updates when you use new email services. You must also avoid mistakes like having multiple SPF records. Both steps keep your domain secure and your emails reliable.
Updating For New Services
Add new services to your SPF record as you start using them. Each email service sends mail on your behalf. You must include their servers in your SPF record. This tells recipients that these services are allowed to send emails from your domain.
Check your SPF record regularly. Add new service IPs or domains carefully. This keeps your SPF record accurate and effective. Without updates, emails from new services may be marked as spam or rejected.
Avoiding Multiple Spf Records
Your domain can have only one SPF record. Multiple SPF records cause errors and mail delivery problems. Instead of creating a new SPF record, combine all authorized senders into one record.
Use the “include” mechanism to add services. This keeps your SPF record clean and valid. Test your SPF record after changes to ensure it works properly. A single, correct SPF record protects your domain best.

Credit: servicesground.com

Credit: myemma.com
Frequently Asked Questions
How To Generate A Spf Record For A Domain?
Log in to your domain host account and open the DNS management page. Add a new TXT record with your SPF details. Use “@” or leave the host blank, set TTL to default, and save. Combine with existing SPF records to avoid duplicates.
How Do You Include A Domain In Spf Record?
Log in to your domain’s DNS manager. Add or edit the TXT record with your SPF value including the domain using “include:domain. com”. Save changes to update the SPF record.
How To Find The Spf Record For A Domain?
Log in to your domain host account and open DNS management. Locate or add a TXT record with “v=spf1” data. Save changes to publish your domain’s SPF record.
How Do I Make Sure The Domain Has A Valid Spf Record?
Log in to your domain host’s DNS manager. Locate existing SPF TXT records or add a new one. Ensure only one SPF record exists per domain. Validate the record using online SPF check tools to confirm it is correctly published and active.
Conclusion
Setting up a GetResponse SPF record helps protect your email domain. It improves email delivery and reduces spam risks. Follow each step carefully to avoid errors. Always check your DNS settings after adding the record. Keep your SPF record updated if you change email services.
This simple process keeps your emails trusted and secure.


