Are you looking to update the sender name that appears when you send emails through GetResponse? Whether you want to make your messages look more professional or simply reflect a new brand identity, changing your name on GetResponse is easier than you think.
In this guide, you’ll discover step-by-step how to quickly and confidently update your sender name. By the end, you’ll be able to connect with your audience using the name you want them to see—boosting trust and engagement with every email you send.
Keep reading to learn exactly how to make this important change in just a few simple clicks.
Getresponse Sender Name Basics
Changing the sender name in GetResponse helps personalize your emails. Access the settings, find the sender name option, and enter your new name. Save changes to update how recipients see your emails.
The sender name in GetResponse is the identity your recipients see. It shows who the email is from. This small detail shapes your email’s first impression. A clear sender name builds trust and improves open rates. Changing your sender name helps keep your brand fresh and relevant. Understanding where and why this name appears is important. It helps you manage your email campaigns better.
Why Sender Name Matters
The sender name is the first thing people notice. It tells recipients if the email is from someone they know. A familiar sender name reduces the chance of your email being ignored or marked as spam. It increases the chances that readers will open and read your message. A good sender name supports your brand identity. It also creates a personal connection with your audience. Changing the sender name can reflect new branding or campaigns.
Where Sender Name Appears
The sender name appears in the recipient’s inbox. It shows next to the subject line of your email. It also appears in notifications on mobile devices. Some email clients display the sender name in the preview pane. It helps recipients decide whether to open your email. The sender name may also show in spam or junk folders. Keeping it clear and consistent helps your emails get noticed and trusted.

Credit: www.youtube.com
Accessing Getresponse Settings
Accessing the settings in GetResponse is the first step to changing your From name. The platform’s interface is user-friendly, making it simple to find what you need. Follow clear steps to reach the email settings where you can update your sender name.
This guide breaks down how to log in and navigate to the right section quickly. It helps save time and avoids confusion for all users.
Logging Into Your Account
Open your web browser and go to the GetResponse homepage. Enter your email and password in the login fields. Click the “Sign In” button to access your dashboard. Make sure your credentials are correct to avoid login errors. If you forgot your password, use the recovery option provided.
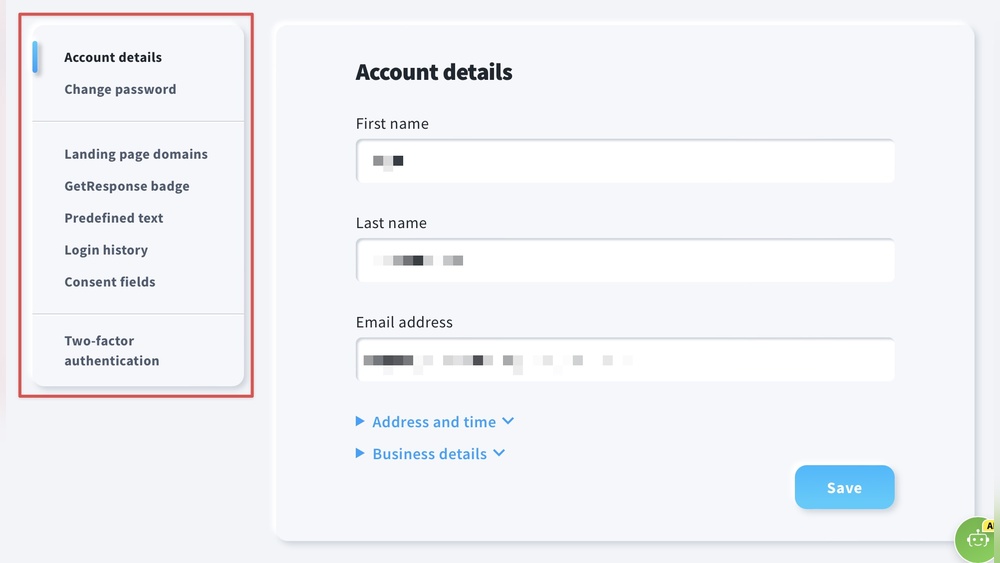
Navigating To Email Settings
Once logged in, locate the main menu on the left side of the screen. Click on “Email Marketing” to expand the options. Select “Settings” from the dropdown list. Look for the “From name” field within these settings. This is where you can edit your sender name for your email campaigns. Save your changes before exiting to apply the new name.
Changing The Sender Name
Changing the sender name in GetResponse helps your emails look more personal and professional. It improves trust and increases the chance your emails get opened. This section explains how to update the sender name step-by-step.
Locating The Sender Name Field
First, log in to your GetResponse account. Navigate to the “Email Marketing” tab on the dashboard. Select “Create Newsletter” or open an existing campaign.
In the email editor, look for the “From” section. Here you will find the sender name field. This is where you can update the name that your recipients will see.
Entering A New Sender Name
Click inside the sender name field to edit it. Delete the old name and type the new sender name you want to use.
Choose a name that your contacts will recognize easily. This helps build trust and improves open rates.
Saving Your Changes
After entering the new sender name, scroll down to find the “Save” or “Apply” button. Click it to save your changes.
Always double-check that the new sender name appears correctly before sending your email. This ensures your message looks professional and clear.

Credit: www.getresponse.com
Testing The New Sender Name
Testing the new sender name is an important step after changing it in GetResponse. This ensures your emails appear professional and recognizable to your recipients. Proper testing helps avoid mistakes that could harm your email deliverability or brand image.
Testing involves sending a test email and checking how the recipient sees your new sender name. This simple process confirms everything looks correct before sending to your full list.
Sending A Test Email
Start by creating a test campaign or email draft in GetResponse. Enter the new sender name you want to use. Send the email to your own address or a small test group.
Check the email arrives without errors. This confirms the sender name change works in GetResponse settings. It also shows how the email looks with the new name.
Verifying Recipient View
Open the test email in different email clients like Gmail, Outlook, or Yahoo. Look at the sender name displayed in the inbox. Make sure it matches your new chosen name exactly.
Ask a few people to check the test email on their devices. This helps catch any display issues on mobile or desktop. Confirm the new sender name appears clearly and professionally.
Troubleshooting Sender Name Issues
Changing your sender name in GetResponse is simple. Sometimes, the new name might not show right away. This can cause confusion or worry about whether your emails look professional. Troubleshooting sender name issues helps fix these problems quickly. It ensures your emails carry the correct identity and build trust with your audience.
Understanding common reasons behind these issues saves time. It also improves your email marketing results by keeping your messages consistent. The tips below guide you through common problems and how to avoid them.
Changes Not Reflecting
After updating your sender name, changes might take time to appear. GetResponse may need a few minutes to process updates. Refresh your browser or clear your cache to see the new name. Sometimes, email providers cache sender details, delaying the update in your inbox.
Check your email settings carefully. Make sure you saved the new sender name correctly. If using multiple campaigns, confirm the change applies to all relevant ones. Sending a test email helps verify the update immediately.
Common Mistakes To Avoid
One mistake is not saving changes after editing the sender name. Always click the save button before leaving the page. Another error is using special characters or long names, which some email clients may block or alter.
Avoid using different sender names in the same campaign. This can confuse recipients and reduce email trust. Keep your sender name clear, simple, and consistent across all emails. Double-check your spelling to prevent errors that hurt your brand image.
Tips For Effective Sender Names
Choosing the right sender name is crucial for email success. It influences whether recipients open your message or ignore it. A clear, trustworthy sender name builds confidence and improves open rates. Follow these tips to make your sender name effective and professional.
Keeping It Professional
Use a sender name that sounds reliable and respectful. Avoid nicknames or informal words. Stick to your real name or your company’s name. This helps recipients recognize you instantly. A professional name increases trust and encourages email engagement.
Using Brand Consistency
Keep your sender name consistent across all emails. Use the same name that appears on your website and social media. Consistency strengthens your brand identity. It also helps recipients remember you and your messages. Avoid changing names frequently to prevent confusion.
Avoiding Spam Triggers
Do not use all caps or excessive punctuation in your sender name. These can make your email look like spam. Avoid special characters and too many numbers. Use simple, clear language to pass spam filters. A clean sender name improves your email’s deliverability.
Alternatives And Advanced Options
Exploring alternatives and advanced options for changing the From Name on GetResponse offers more control. These methods help you customize your email identity beyond basic settings. You can create a professional look that matches your brand or personal style.
Using custom domains and setting up multiple sender names are two powerful strategies. Both improve your email deliverability and help recipients recognize your messages easily.
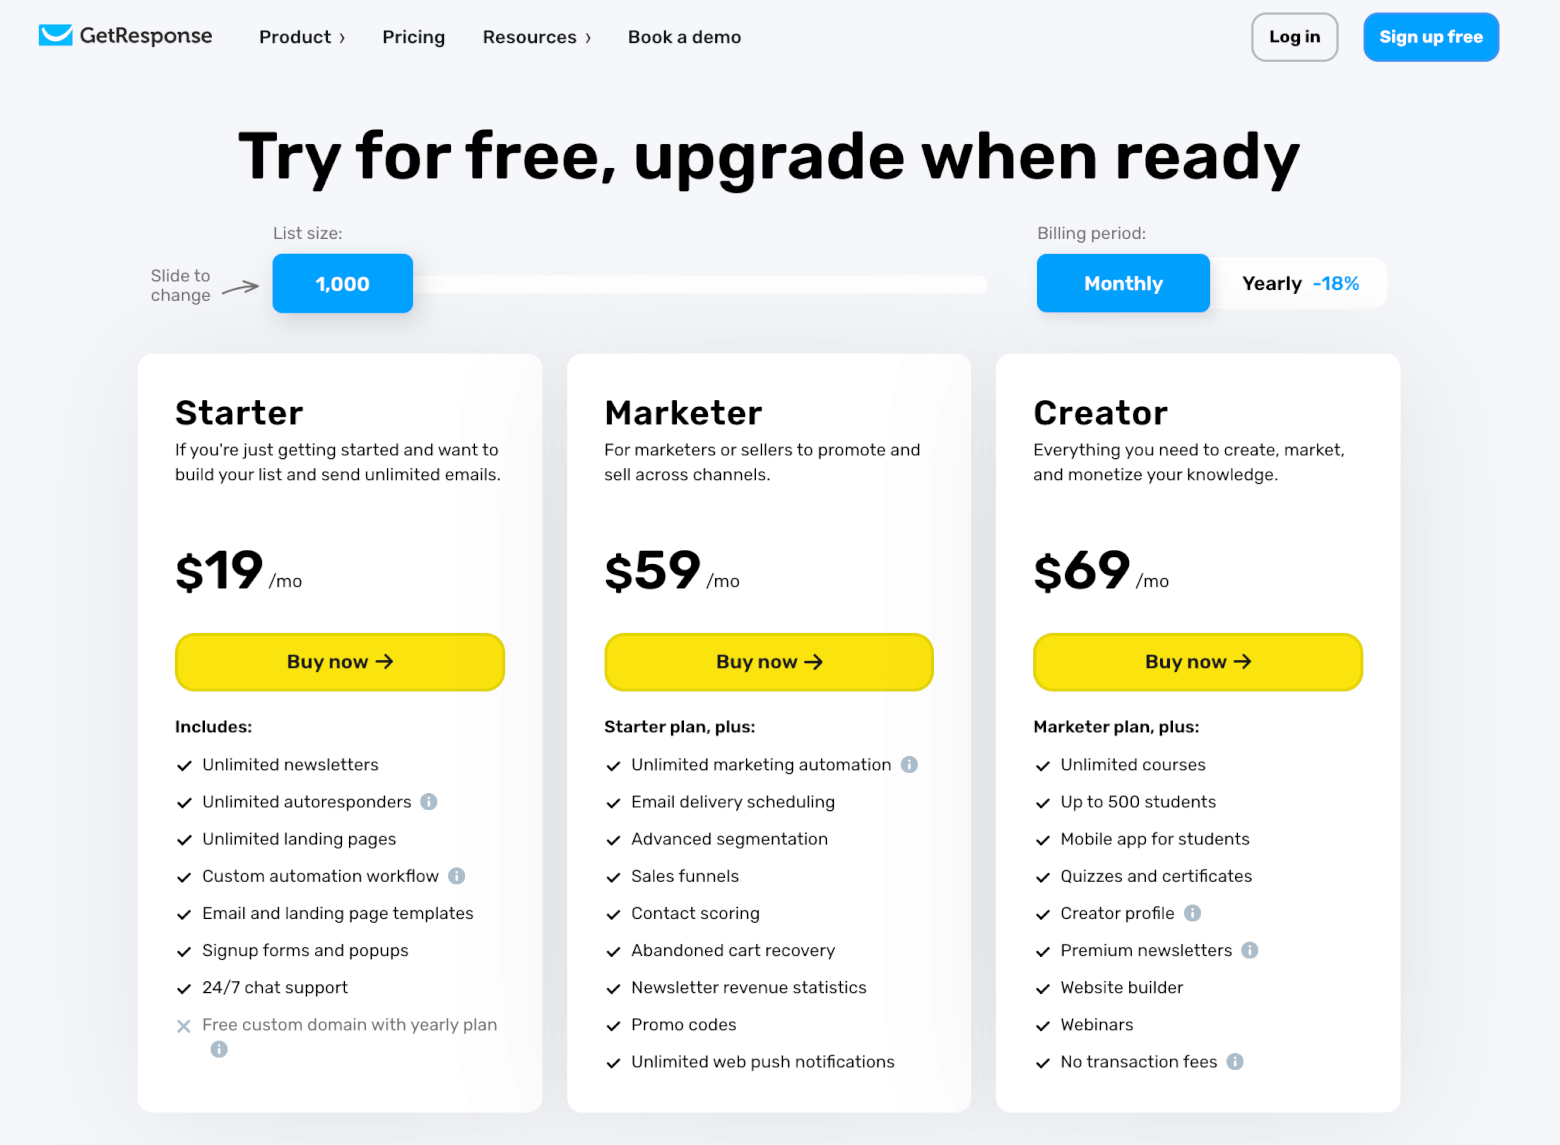
Using Custom Domains
Custom domains give your emails a unique address linked to your brand. This builds trust with your audience and reduces the chance of emails landing in spam folders. GetResponse allows you to connect your own domain to your email campaigns.
After setting up a custom domain, your From Name can include your domain name. This makes your emails look more professional. It also helps recipients identify your company quickly.
To use a custom domain, verify ownership through DNS settings. Then configure GetResponse to send emails from that domain. This step strengthens your email’s credibility.
Setting Up Multiple Sender Names
GetResponse lets you create several sender names within one account. This is useful if you manage different brands or departments. Each sender name can have its own email address and identity.
By switching sender names, you can target different audiences with tailored messages. For example, sales and support can use separate From Names. This keeps communication clear and relevant.
Setting up multiple sender names involves adding and verifying each name in your account settings. After that, choose the appropriate sender when creating campaigns. This flexibility improves your email marketing strategy.
Credit: www.emailtooltester.com
Frequently Asked Questions
How Do I Change The Sender Name On An Email?
Open your email settings, locate the “Send mail as” or “Your name” option, edit the sender name, and save changes.
How Do I Change The Display Name That Email Recipients See?
To change the display name recipients see, open your email settings. Locate “Send mail as” or “Your name” field. Edit and save the new name. Steps vary by provider—Gmail, Outlook, Yahoo, or Apple Mail have specific menus for this change.
How Do I Change My Login On Getresponse?
To change your login on GetResponse, log in and go to Account Settings. Select “Profile,” update your email or username, then save changes.
Why Is My Email Showing A Different Name?
Your email shows a different name because your sender name settings differ. Update the “Send mail as” or “Your name” field in your email account settings to fix this.
Conclusion
Changing your from name on GetResponse is simple and quick. Just follow the clear steps outlined above. This helps make your emails look professional and trustworthy. Always double-check your changes before sending emails. Keep your sender name consistent to build a strong brand.
Now you can easily update your GetResponse from name anytime. Stay confident when connecting with your audience through email.