To cancel Bluehost, log in to your account, go to the ‘Account Settings’, and follow the cancellation prompts. Ensure you confirm the cancellation via email.
Bluehost is a popular web hosting provider known for its reliable services. Sometimes, users may need to cancel their hosting plans due to changing business needs or personal preferences. The cancellation process is straightforward, but it requires careful attention to ensure all steps are completed.
This guide will help you navigate the cancellation process smoothly, avoiding any unnecessary charges. Understanding how to properly cancel your Bluehost account can save you time and ensure your data is handled correctly. Follow the steps outlined to make the cancellation process as seamless as possible.
Credit: www.websiteplanet.com
Preparing For Cancellation
Before cancelling your Bluehost account, some steps need to be taken. Proper preparation ensures a smooth cancellation process. Let’s explore the necessary steps.
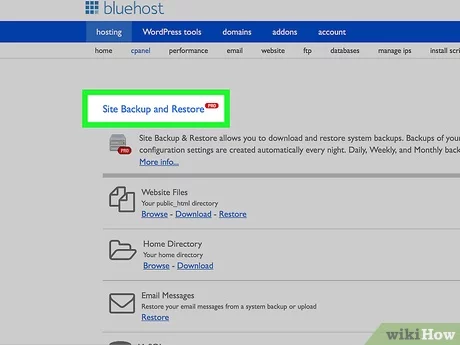
Backup Your Data
Ensure that all your website data is safe. Backing up your data is crucial. Losing important files can be disastrous.
Follow these steps to backup your data:
- Log in to your Bluehost account.
- Navigate to the File Manager.
- Select the files you wish to backup.
- Click on the Download button.
Keep a copy of your data in a secure location. Use an external hard drive or cloud storage.
Review Your Account
Check your account details before cancellation. Review any active subscriptions or services. Ensure there are no pending charges.
Steps to review your account:
- Log in to your Bluehost account.
- Click on Account Settings.
- Review your billing and service details.
Make sure to cancel any additional services you no longer need. Avoid unexpected charges after cancellation.
Credit: www.youtube.com
Accessing Your Bluehost Account
Canceling your Bluehost account starts with accessing your account. This step is essential. Follow these simple steps to get into your Bluehost account.
Logging In
First, open your web browser. Visit the Bluehost website. You will see the login button at the top right corner. Click the Login button.
Enter your email address in the email field. Type in your password in the password field. Click the Submit button to log in. You will now be on your Bluehost dashboard.
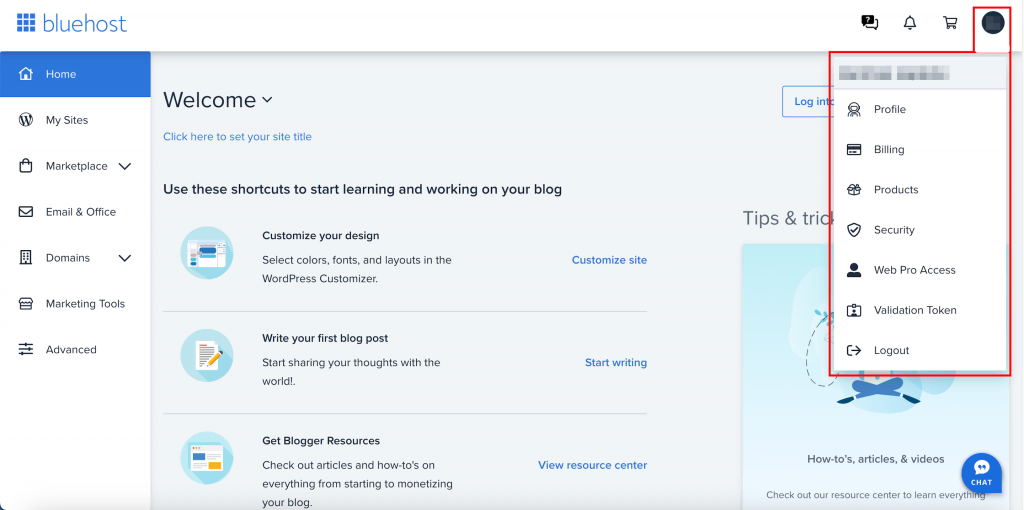
Navigating To Account Settings
On your dashboard, look for the Account icon. It is usually found on the top right corner. Click on this icon.
A dropdown menu will appear. Select the Account Settings option. This will take you to the account settings page.
On the account settings page, find the Billing section. Click on the Billing tab. Here, you can manage your account details and cancel your service.
Initiating The Cancellation Process
Starting the process to cancel your Bluehost account is simple. Follow these steps to ensure a smooth experience. This guide covers the initial steps you need to take.
Finding The Cancellation Option
First, log in to your Bluehost account. Go to the dashboard. Look for the Account Settings menu. Under this menu, find the Billing Information section. You will see the Cancellation option here.
Selecting The Reason For Cancellation
After clicking the Cancellation option, you will be asked for a reason. A dropdown menu will appear. Select your reason from the list. This step is important for feedback purposes.
Confirming Cancellation
Confirming the cancellation of your Bluehost account is a crucial step. This ensures your account is closed properly, and you avoid unexpected charges. Follow these steps to confirm your cancellation successfully.
Reviewing Cancellation Details
Before finalizing your cancellation, review all the details carefully. Check if you have any remaining services or subscriptions. Make sure there are no pending bills or unresolved issues.
- Review your account status.
- Check for active subscriptions.
- Ensure no pending payments exist.
Taking these steps helps in avoiding any future complications.
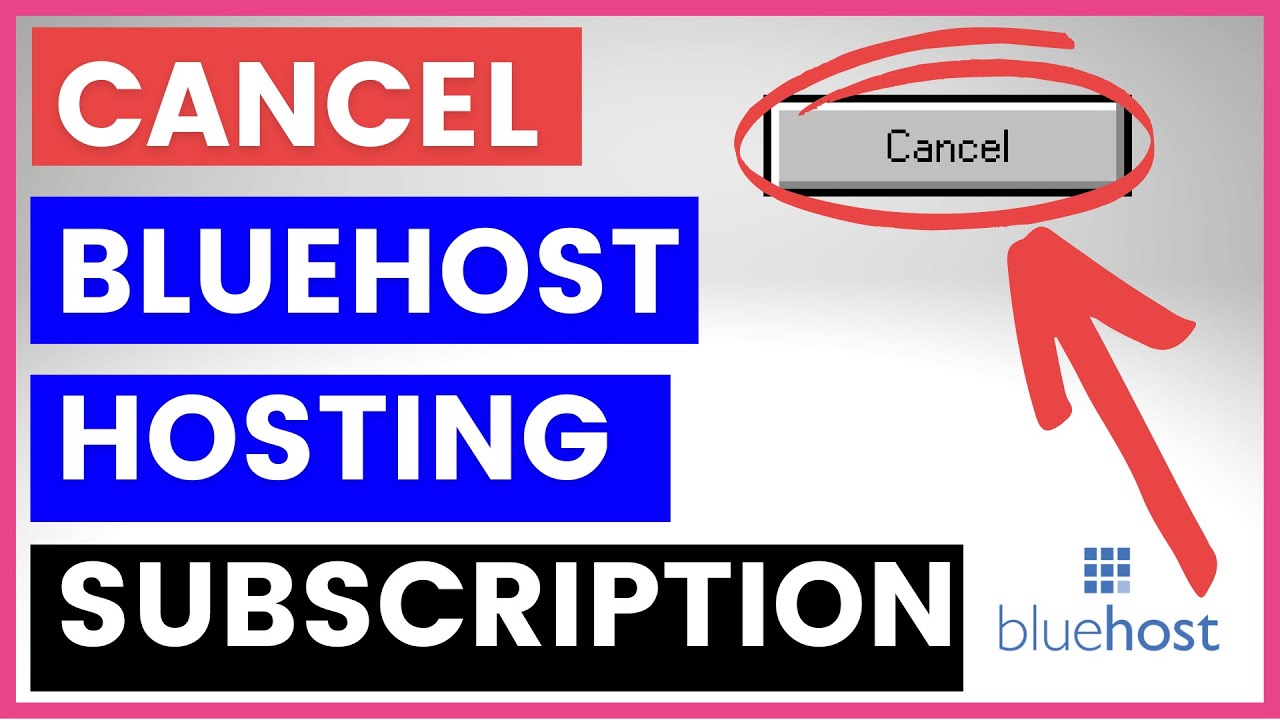
Final Confirmation Steps
After reviewing, proceed to the final steps to confirm your cancellation.
- Log in to your Bluehost account.
- Go to the Account Settings section.
- Click on the Cancel Account button.
- Follow the on-screen instructions to complete the process.
Once you complete these steps, your cancellation request will be processed. You will receive a confirmation email shortly after.
Remember, double-check all details to ensure a smooth cancellation process.
Post-cancellation Steps
After you cancel your Bluehost account, there are a few crucial steps to follow. These steps ensure a smooth transition and help you avoid issues.
Verifying Cancellation
First, confirm that your cancellation request has been processed. Log into your Bluehost account. Check for any notifications or messages about the cancellation. Look for an email from Bluehost confirming the cancellation. This email usually contains important details.
Checking For Refunds
Next, verify if you are eligible for a refund. Bluehost offers a 30-day money-back guarantee. Log into your Bluehost account. Navigate to the billing section. Look for any refund notifications. If eligible, you should see a pending refund. Contact Bluehost support if you do not see a refund. Provide them with your cancellation details. They can assist you in processing your refund.
Switching To A New Provider
Switching to a new provider can seem daunting. But with the right steps, it’s manageable. This section will guide you through the process.
Choosing A New Host
Before canceling Bluehost, select a new hosting provider. Consider these factors:
- Pricing: Compare costs and find the best value.
- Features: Ensure the new host offers what you need.
- Customer Support: Check for 24/7 support and good reviews.
- Uptime Guarantee: Look for a provider with high uptime.
Research different hosts and read customer reviews. This helps in making an informed decision.
Migrating Your Website
Once you have chosen a new host, it’s time to move your website. Follow these steps:
- Backup Your Website: Create a full backup of your files and database.
- Set Up New Hosting: Sign up and set up your new hosting account.
- Upload Files: Transfer your website files to the new host.
- Import Database: Import your database to the new hosting provider.
- Update DNS Settings: Change your domain’s DNS to point to the new host.
After updating DNS settings, it may take up to 48 hours for changes to propagate. During this time, monitor your website to ensure everything is working smoothly.
Tips And Best Practices
Canceling your Bluehost account can be a straightforward process if you follow some tips and best practices. This guide will help you avoid potential issues and ensure a smooth transition.
Avoiding Downtime
Downtime can affect your website’s accessibility. To avoid downtime, follow these steps:
- Schedule the cancellation during low-traffic periods.
- Back up your website data before canceling.
- Inform your users about the scheduled downtime.
Using these tips ensures that your website remains accessible to your users.
Managing Domain Names
Proper domain management is crucial during cancellation. Follow these practices:
- Check your domain renewal status. Ensure it’s not expiring soon.
- Transfer your domain to another registrar if needed.
- Update your DNS settings to point to a new host.
These steps will help you manage your domain names effectively during the transition.
Pro Tip: Use a domain management tool to keep track of your domains.
Credit: www.hostinger.com
Frequently Asked Questions
Can I Cancel Bluehost At Any Time?
Yes, you can cancel Bluehost at any time. Contact their support for assistance. Refund policies may apply.
How Do I Permanently Delete My Bluehost Account?
To permanently delete your Bluehost account, log in, go to the “Account Settings” tab, and click “Close Account. “
How Do I Get My Money Back From Bluehost?
To get a refund from Bluehost, contact their support within 30 days of purchase. Request a cancellation and refund.
How To Stop Bluehost Auto Renew?
Log in to your Bluehost account. Go to the “Account” tab, then “Renewal Options. ” Disable auto-renewal. Save changes.
Conclusion
Canceling Bluehost is simple if you follow the right steps. Always back up your data before canceling. Contact their support for assistance, if needed. Understanding the process helps avoid unexpected issues. Follow the guidelines mentioned to ensure a smooth cancellation experience.
Thank you for reading, and good luck!