To access Hostinger cPanel, log in to your Hostinger account and navigate to the “Hosting” section. Click on “Manage” next to your desired hosting plan.
Hostinger offers a user-friendly interface for managing your website. Accessing the cPanel is straightforward, making it ideal for both beginners and advanced users. Once logged in, you can easily manage domains, databases, files, and other essential features. The cPanel provides various tools to enhance your website’s performance and security.
With just a few clicks, you can install applications, set up email accounts, and monitor your site’s metrics. Hostinger’s cPanel simplifies the process, allowing you to focus on growing your online presence. This intuitive control panel ensures efficient website management, making it a popular choice among webmasters.
Credit: www.hostinger.com
Getting Started
Accessing Hostinger’s cPanel is simple and straightforward. This guide will help you create a Hostinger account and choose the right hosting plan for your needs. Follow the steps below to get started with Hostinger.
Creating A Hostinger Account
To begin, you’ll need to create a Hostinger account. Follow these steps:
- Visit the Hostinger website.
- Click on the “Sign Up” button at the top right corner.
- Enter your email address and create a strong password.
- Agree to the terms and conditions, then click “Create Account”.
Once your account is created, you’ll receive a confirmation email. Click on the link in the email to verify your account. Congratulations, you now have a Hostinger account!
Choosing A Hosting Plan
Next, it’s time to choose a hosting plan that suits your needs. Hostinger offers several plans:
| Plan | Features | Price |
|---|---|---|
| Single Shared Hosting |
| $1.99/month |
| Premium Shared Hosting |
| $2.99/month |
| Business Shared Hosting |
| $4.99/month |
Consider your website’s needs when selecting a plan. If you’re just starting, the Single Shared Hosting plan is a great choice. For larger projects, the Premium or Business plans offer more features and better performance.
Once you select a plan, complete the payment process. You are now ready to access Hostinger’s cPanel and start building your website!
Logging Into Hostinger
Logging into Hostinger is simple and quick. This guide helps you access your Hostinger dashboard and find the cPanel login. Follow the steps below to get started.
Accessing The Hostinger Dashboard
First, visit the Hostinger website. Click on the “Login” button at the top-right corner. Enter your email and password.
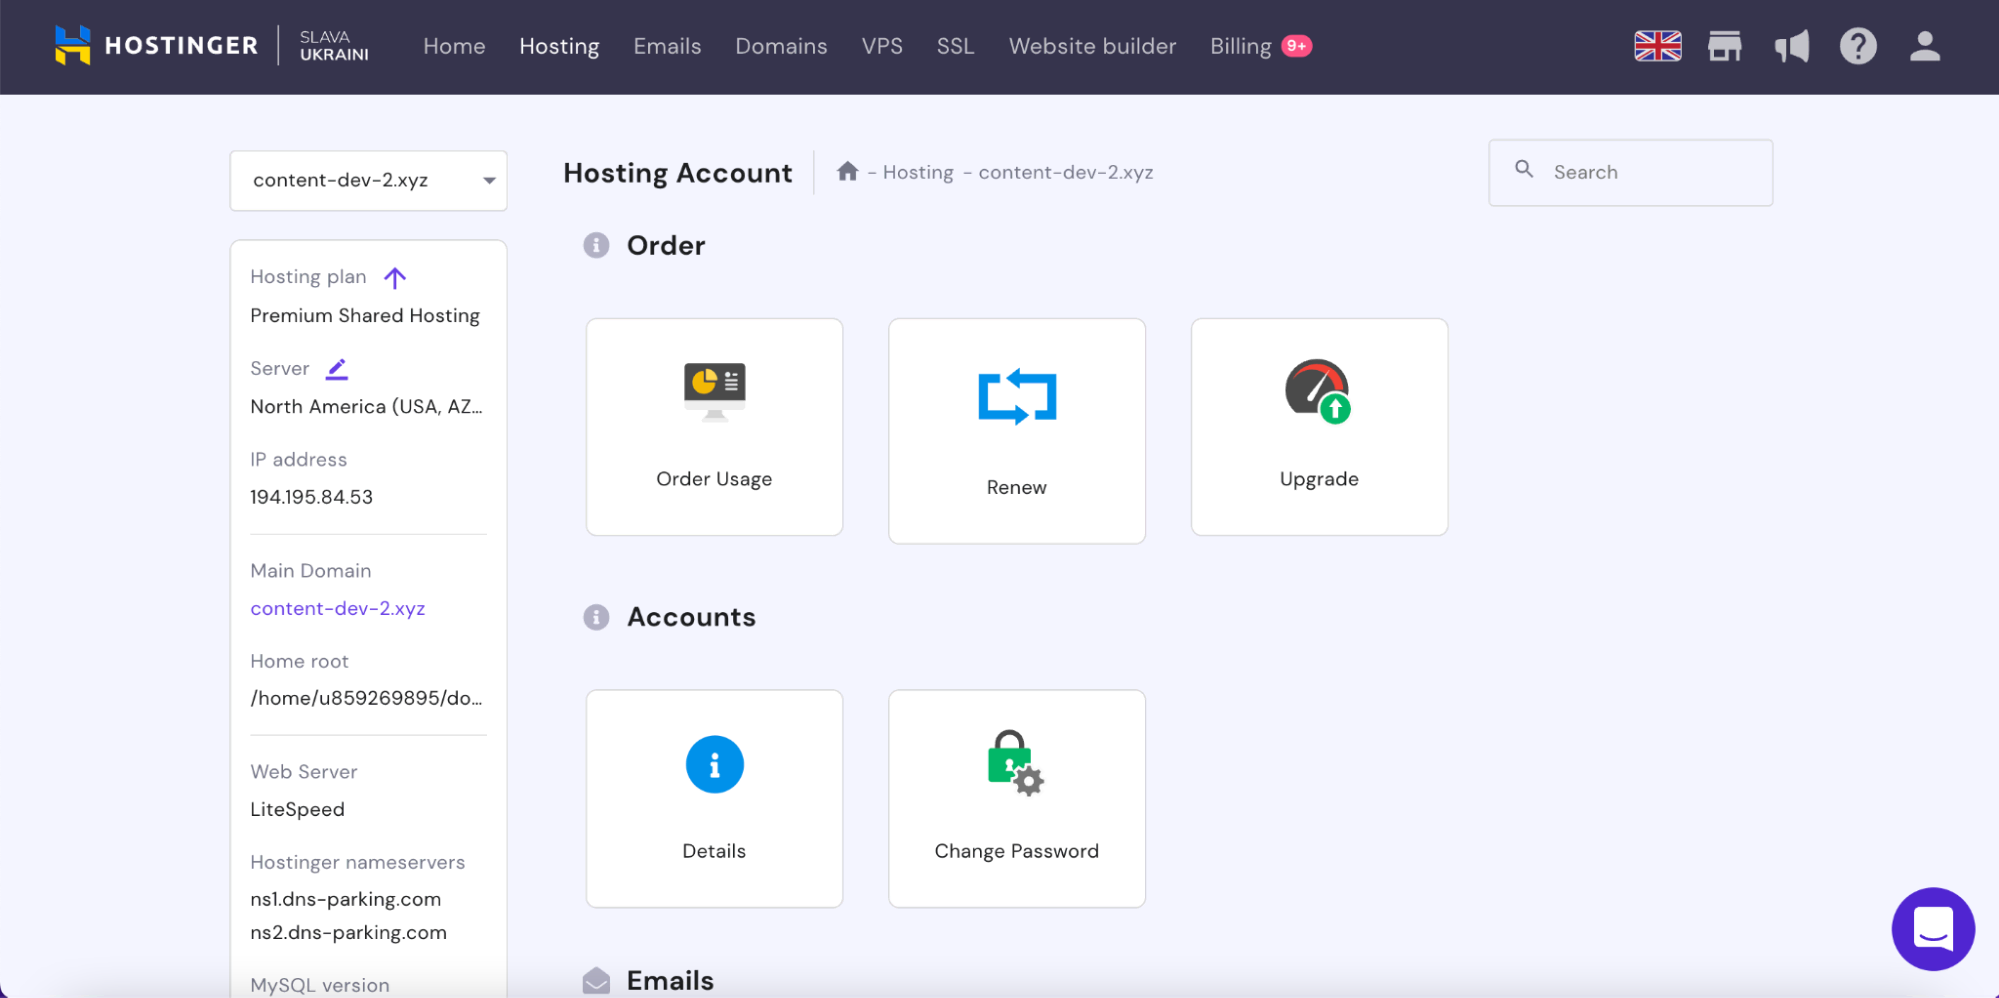
Once logged in, you will see your Hostinger dashboard. The dashboard is your control center. It displays your hosting accounts, domains, and other services.
Finding The Cpanel Login
From the dashboard, find the hosting account you want to manage. Click on “Manage” next to your hosting account. This will open the control panel options.
Scroll down until you see the “cPanel” icon. Click on the cPanel icon to access your cPanel dashboard. Now, you can manage your website and server settings.
Here is a summary of the steps:
- Visit Hostinger website.
- Click “Login” and enter your credentials.
- Navigate to your hosting account.
- Click “Manage” next to your account.
- Click the “cPanel” icon.
Navigating Cpanel
Accessing and navigating Hostinger’s cPanel is essential for managing your website. It’s user-friendly and packed with tools. This guide will help you understand the cPanel interface.
Dashboard Overview
The cPanel dashboard is the control center of your website. It’s divided into sections for easy navigation. You can find the most important tools here.
| Section | Description |
|---|---|
| Files | Manage your website files and directories. |
| Databases | Handle MySQL and other database services. |
| Domains | Control your domain settings and subdomains. |
| Set up and manage email accounts and forwarders. | |
| Metrics | View website statistics and performance data. |
Key Features And Tools
cPanel provides various tools to enhance your website. Below are some key features:
- File Manager: Upload, edit, and delete files directly.
- Backup Wizard: Create and manage website backups easily.
- phpMyAdmin: Access and manage your MySQL databases.
- Email Accounts: Create and manage email accounts.
- SSL/TLS: Secure your website with SSL certificates.
These tools are crucial for maintaining a functional and secure website. Knowing how to use them will make your website management easier.

Credit: m.youtube.com
Managing Domains
Managing domains in Hostinger’s cPanel is essential for your website. You can add new domains, set up subdomains, and more. This section will guide you through the steps. Let’s dive into the specifics.
Adding A New Domain
Adding a new domain to your Hostinger account is simple. Follow these steps to get started:
- Log in to your Hostinger cPanel account.
- Navigate to the Domains section.
- Click on Add New Domain.
- Enter the domain name you wish to add.
- Click Submit and verify ownership.
Once added, you can manage your new domain easily. Hostinger provides user-friendly tools to help you. You can also set up DNS records for your domain.
Setting Up Subdomains
Subdomains help organize your website content. They can also create separate sections within your main domain. Here’s how to set them up:
- Log in to Hostinger cPanel.
- Go to the Subdomains section.
- Enter the name of the subdomain you wish to create.
- Select the main domain from the drop-down menu.
- Click on Create to finish setting up.
You can create multiple subdomains as needed. They are useful for creating blogs, stores, or forums. Hostinger makes the process straightforward and efficient.
Email Accounts
Hostinger Cpanel offers powerful tools for managing your email accounts. You can create new email addresses, set up email forwarding, and manage your inbox efficiently. Let’s explore how to make the most of these features.
Creating Email Addresses
Creating an email address in Hostinger Cpanel is simple. Follow these steps:
- Log in to your Hostinger Cpanel account.
- Navigate to the “Email Accounts” section.
- Click on the “Create” button.
- Enter the desired email address and password.
- Click “Create” to finalize.
Your new email address is now ready to use. You can access it via webmail or any email client.
Managing Email Forwarding
Email forwarding allows you to redirect emails from one address to another. This is useful for consolidating multiple email accounts. Here’s how to set it up:
- Go to the “Email Forwarders” section in Cpanel.
- Click on “Add Forwarder”.
- Enter the source email address.
- Specify the destination email address.
- Click “Add Forwarder” to save.
Now, emails sent to your source address will be forwarded automatically. This helps keep your inbox organized.
| Feature | Description |
|---|---|
| Create Email | Create new email addresses easily. |
| Email Forwarding | Forward emails to another address. |
These tools make managing your email accounts on Hostinger Cpanel convenient and efficient.
File Management
File management is crucial for website maintenance. Hostinger’s cPanel offers easy ways to manage files. This guide will help you understand file management in Hostinger cPanel.
Uploading Files
Uploading files to your Hostinger account is simple. You can upload files directly via the cPanel. Follow these steps to upload files:
- Log in to your Hostinger cPanel.
- Navigate to the File Manager section.
- Click on the Upload button at the top.
- Select the files you want to upload from your computer.
- Wait for the files to upload completely.
Once the upload is complete, you can see the files in your chosen directory.
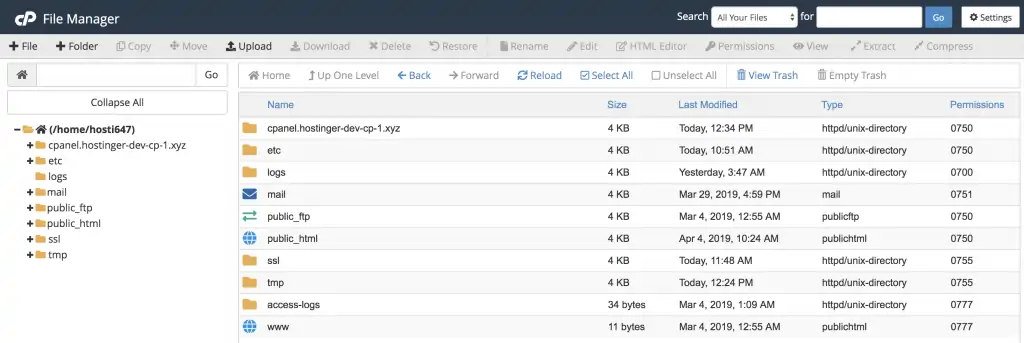
Using File Manager
The File Manager in Hostinger cPanel offers a user-friendly interface. You can manage files and directories easily. Here’s how you can use the File Manager:
- Open cPanel and go to File Manager.
- Browse to the directory you want to manage.
- Use the toolbar to create, delete, or move files.
- Right-click on a file to rename or edit it.
The File Manager also allows you to set permissions for files and directories. This ensures your files are secure.
| Action | Description |
|---|---|
| Create | Create new files or directories. |
| Delete | Remove unwanted files or directories. |
| Move | Move files to different directories. |
| Rename | Change the name of files or directories. |
| Edit | Edit file contents directly. |
Using the File Manager in Hostinger cPanel makes file management efficient. You can perform various tasks without needing FTP clients.
Security Settings
Securing your Hostinger Cpanel is crucial for protecting your website. Proper security settings can prevent unauthorized access and data breaches. Let’s explore how to enhance your website’s security by enabling SSL certificates and setting up backups.
Enabling Ssl Certificates
SSL certificates encrypt data exchanged between your site and visitors. This encryption keeps sensitive information safe.
- Log in to your Hostinger Cpanel.
- Navigate to the SSL section.
- Select your domain from the list.
- Click on Install SSL.
- Follow the prompts to complete the installation.
Once installed, your website will use HTTPS instead of HTTP. This change improves security and boosts SEO rankings.
Setting Up Backups
Regular backups are essential for data safety. They allow you to restore your website quickly in case of data loss.
| Step | Action |
|---|---|
| 1 | Log in to Hostinger Cpanel. |
| 2 | Go to the Backups section. |
| 3 | Click on Generate New Backup. |
| 4 | Wait for the process to complete. |
| 5 | Download the backup file to your computer. |
Schedule automatic backups to ensure your data is always secure. Hostinger offers various backup frequency options.
Database Management
Managing your databases is crucial for your website’s performance. Hostinger’s cPanel makes this process simple. With a few clicks, you can create and manage your databases effortlessly. This guide will help you understand how to navigate database management in Hostinger cPanel.
Creating Databases
To create a new database in Hostinger cPanel, follow these steps:
- Log in to your Hostinger cPanel account.
- Navigate to the Databases section.
- Click on MySQL Databases.
- Enter the name for your new database.
- Click Create Database.
Creating a database is that simple. Now, let’s move on to managing it.
Managing Phpmyadmin
phpMyAdmin is a powerful tool for database management. To access it:
- Go to the Databases section in your cPanel.
- Click on phpMyAdmin.
- Select the database you want to manage.
Inside phpMyAdmin, you can:
- Create tables and organize your data.
- Run SQL queries to manipulate your database.
- Backup your database to prevent data loss.
phpMyAdmin offers a user-friendly interface to handle all database tasks.
Hostinger cPanel makes database management easy and efficient. Create and manage your databases with ease.
Troubleshooting
Experiencing issues while accessing your Hostinger cPanel can be frustrating. Understanding common problems and how to solve them ensures a smoother experience.
Common Issues
Here are some common issues users face when accessing Hostinger cPanel:
- Incorrect login credentials
- Browser compatibility problems
- Network connectivity issues
- Account suspension
Make sure your username and password are correct. Double-check for any typos.
Ensure your browser is up-to-date. Sometimes, outdated browsers can cause access issues.
Check your internet connection. A weak or unstable connection can prevent access.
Verify your account status. If your account is suspended, you won’t be able to log in.
Contacting Support
If you still can’t access your Hostinger cPanel, contacting support is your next step.
Hostinger offers various ways to get help:
| Support Method | Details |
|---|---|
| Live Chat | Available 24/7 on the Hostinger website |
| Send an email to support@hostinger.com | |
| Knowledge Base | Access articles and tutorials for troubleshooting |
Provide detailed information about your issue to get faster assistance. Mention any error messages you see.
Using these support methods, you can quickly resolve any access issues.
Credit: www.hostinger.com
Frequently Asked Questions
How Do I Get To My Cpanel On Hostinger?
Log in to your Hostinger account. Go to the “Hosting” section. Click on “Manage” next to your domain. Select “cPanel. “
Is Hostinger Have Cpanel?
Hostinger does not use cPanel. It provides its own custom control panel called hPanel.
How Do I Access Cpanel Directly?
Access cPanel directly by typing “yourdomain. com/cpanel” in your browser. Enter your username and password to log in.
How Do I Get To The Hostinger Control Panel?
Log in to your Hostinger account. Navigate to the dashboard. Click on the “Hosting” tab. Select your domain. Click “Manage. “
Conclusion
Navigating Hostinger’s cPanel is straightforward with the right steps. By following this guide, you can manage your website efficiently. Always ensure your credentials are secure. Regular updates and backups can prevent potential issues. Now, you are ready to make the most of Hostinger’s features for your website success.