To make a website on Hostinger, sign up for a hosting plan and choose a domain name. Use Hostinger’s website builder or WordPress to create your site.
Creating a website on Hostinger is straightforward. Hostinger offers various hosting plans tailored for different needs, from personal blogs to business websites. After selecting a plan and a domain name, you can use Hostinger’s intuitive website builder. This tool allows you to design your site with ease, even if you lack technical skills.
Alternatively, install WordPress through Hostinger’s one-click installer for more customization options. Hostinger provides a user-friendly interface and 24/7 customer support. This makes the process smooth for beginners and experienced users alike. Enjoy features like high-speed performance, security, and scalability for your website.
Getting Started
Creating a website on Hostinger is simple and quick. This guide will help you through the initial steps. You’ll learn to choose a domain and set up hosting. Let’s dive in!
Choosing A Domain
Your domain name is your website’s address on the internet. It’s essential to pick a memorable and relevant name. Follow these steps:
- Brainstorm Ideas: Think of words related to your content.
- Check Availability: Use Hostinger’s domain checker tool.
- Select a Domain: Choose a name that’s easy to type and remember.
- Register Your Domain: Secure it by registering through Hostinger.
Here are some tips for choosing a good domain name:
- Keep it short and simple.
- Avoid numbers and hyphens.
- Use keywords that describe your business.
Setting Up Hosting
Setting up hosting is the next critical step. Hostinger offers different plans to suit your needs. Follow these steps to set up hosting:
- Choose a Hosting Plan: Select a plan based on your website’s needs.
- Create an Account: Sign up on Hostinger with your email address.
- Make a Payment: Complete the payment process to activate your hosting plan.
- Set Up Your Website: Use Hostinger’s control panel to start building your site.
Below is a comparison table of Hostinger’s hosting plans:
| Feature | Single | Premium | Business |
|---|---|---|---|
| Websites | 1 | Unlimited | Unlimited |
| Email Accounts | 1 | Unlimited | Unlimited |
| Bandwidth | 100 GB | Unlimited | Unlimited |
Choosing the right hosting plan ensures your website runs smoothly. Start with a basic plan if you’re new. You can always upgrade later as your site grows.

Credit: www.youtube.com
Accessing The Control Panel
Accessing the control panel is the first step to create your website on Hostinger. The control panel, known as hPanel, is where you manage your website settings, files, and databases. This guide will help you navigate hPanel and use essential tools for your website.
Navigating Hpanel
To access hPanel, log in to your Hostinger account. Once logged in, click on the Hosting tab. You will see a list of your hosting accounts. Select the account you want to manage. This will take you to the hPanel dashboard.
In the hPanel dashboard, you will find various sections. These sections include Order, Website, Emails, Domains, and Files. Each section has specific tools and settings. The sidebar on the left helps you quickly navigate between sections.
Here is a table to help you understand the main sections in hPanel:
| Section | Description |
|---|---|
| Order | Manage your billing and services. |
| Website | Access website builder and scripts. |
| Emails | Set up and manage email accounts. |
| Domains | Manage domain settings and DNS records. |
| Files | Upload and manage your website files. |
Essential Tools
hPanel offers many tools to build and manage your website. Below is a list of essential tools:
- File Manager: Upload, delete, and edit your website files.
- Auto Installer: Install popular CMS like WordPress with one click.
- MySQL Databases: Create and manage your databases.
- Email Accounts: Set up professional email addresses.
- DNS Zone Editor: Modify your domain’s DNS records.
Using these tools, you can easily set up and maintain your website. The Auto Installer is especially useful for beginners. It allows you to install WordPress and other CMS quickly.
By understanding and using these essential tools, you can ensure your website runs smoothly. Whether you need to upload files, manage databases, or set up emails, hPanel has everything you need.
Installing WordPress
Installing WordPress on Hostinger is a simple process. It allows you to quickly set up your website. Follow these steps to get started.
One-click Installation
Hostinger offers a one-click installation for WordPress. This feature saves time and effort.
- Log in to your Hostinger account.
- Navigate to the hPanel dashboard.
- Select Website from the top menu.
- Click on Auto Installer.
- Choose WordPress from the list of applications.
- Fill in the necessary details like your website name and admin credentials.
- Click Install and wait for the process to complete.
The one-click installation makes setting up WordPress hassle-free. Your website will be ready in minutes.
Configuring Settings
Once WordPress is installed, you need to configure the settings. This step ensures your website runs smoothly.
- Log in to your WordPress admin dashboard.
- Go to Settings in the left-hand menu.
- Update your Site Title and Tagline under General Settings.
- Set your Time Zone and Date Format.
- Under Permalinks, choose the Post Name option for better SEO.
- Save your changes by clicking Save Changes.
Proper configuration of settings enhances your website’s performance. It also helps in SEO optimization.
| Setting | Action |
|---|---|
| Site Title | Update to reflect your brand |
| Tagline | Short description of your site |
| Time Zone | Set to your local time |
| Date Format | Choose your preferred format |
| Permalinks | Select “Post Name” for SEO |
Following these steps ensures your WordPress site is set up correctly. Start building your website with ease on Hostinger.
Designing Your Site
Designing your site on Hostinger can be exciting. Your design reflects your brand and attracts visitors. Follow these steps to create a stunning website.
Selecting A Theme
Start by selecting a theme. Hostinger offers many beautiful themes. Choose a theme that matches your brand’s style.
- Visit the Hostinger dashboard.
- Navigate to the “Themes” section.
- Browse through the available themes.
- Preview different themes to see how they look.
- Click “Activate” to select your desired theme.
Customizing The Layout
After choosing a theme, customize the layout to fit your needs. Tailor the design to enhance user experience.
- Go to the “Customizer” in the dashboard.
- Adjust the header and footer settings.
- Change the color scheme to match your brand.
- Select different fonts for readability.
- Arrange widgets and menus for easy navigation.
Example Layout Customizations:
| Element | Customization |
|---|---|
| Header | Logo, Navigation Menu, Search Bar |
| Footer | Contact Info, Social Media Links |
| Colors | Primary, Secondary, Background |
| Fonts | Headings, Body Text |
Save your changes and preview your site. Make sure everything looks perfect. A well-designed site keeps visitors engaged.
Adding Content
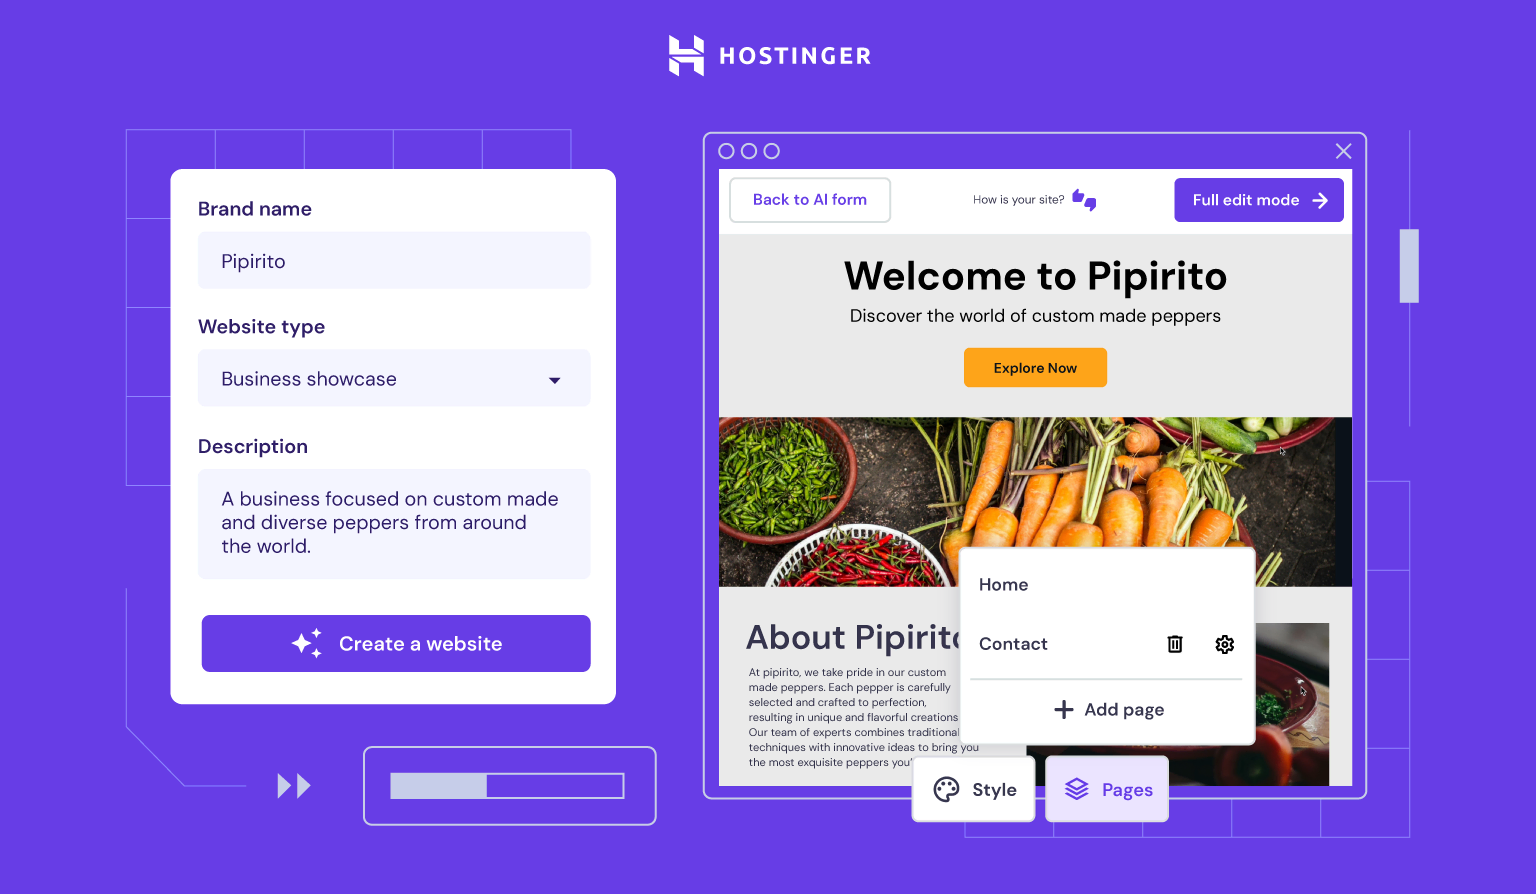
Adding content to your Hostinger website is essential. It keeps your visitors engaged. It also helps improve your search engine rankings. This section will guide you through creating pages and writing blog posts. These steps will make your website more dynamic and user-friendly.
Creating Pages
Pages are the backbone of your website. They provide essential information to visitors. To create a page on Hostinger, follow these steps:
- Log in to your Hostinger account.
- Go to your website dashboard.
- Click on “Pages” in the menu.
- Select “Add New Page”.
- Enter a title for your page.
- Add your content in the editor.
- Click “Publish” to make it live.
Use headings, images, and links to make your pages engaging. Ensure your content is clear and easy to read.
Writing Blog Posts
Blog posts help drive traffic to your site. They also keep your audience informed. To write a blog post on Hostinger, follow these steps:
- Log in to your Hostinger account.
- Go to your website dashboard.
- Click on “Posts” in the menu.
- Select “Add New Post”.
- Enter a catchy title for your post.
- Write your content in the editor.
- Add images, videos, or links to enrich your post.
- Click “Publish” to make it live.
Use short paragraphs and bullet points in your blog posts. This makes them easier to read. Also, include keywords to improve SEO. This helps your blog rank higher on search engines.
| Task | Action |
|---|---|
| Create a Page | Click on “Add New Page” and publish |
| Write a Blog Post | Click on “Add New Post” and publish |
Credit: www.hostinger.com
Enhancing Functionality
Enhancing functionality is crucial for a successful website on Hostinger. This involves adding features, improving speed, and ensuring a smooth user experience. Let’s dive into the key areas to focus on.
Installing Plugins
Plugins add extra features to your website. They help you customize your site without coding skills. Here’s how to install plugins on Hostinger:
- Log in to your WordPress dashboard.
- Navigate to the Plugins section.
- Click on Add New.
- Use the search bar to find the plugin you need.
- Click Install Now and then Activate.
Popular plugins to consider:
- Yoast SEO for search engine optimization.
- WPForms for creating forms.
- WooCommerce for e-commerce features.
- Elementor for easy page building.
Optimizing Performance
Website speed affects user experience and SEO. Optimizing performance is key. Here are steps to enhance your site’s speed:
| Action | Description |
|---|---|
| Image Optimization | Use compressed images to reduce load time. |
| Caching Plugins | Install caching plugins like W3 Total Cache. |
| Minimize HTTP Requests | Reduce the number of elements on a page. |
| Optimize Database | Use plugins like WP-Optimize to clean your database. |
By focusing on these areas, you can ensure your website performs well and offers a great user experience. Your site will be faster, more functional, and ready to engage visitors.
Setting Up Seo
Optimizing your website for search engines is crucial. It helps you reach a broader audience. Proper SEO ensures your site ranks higher in search results. Let’s explore how to set up SEO on Hostinger.
Keyword Research
Keywords are the foundation of SEO. Start by identifying relevant keywords. Use tools like Google Keyword Planner or Ahrefs. Focus on keywords with high search volume and low competition.
Here’s a simple process for keyword research:
- Identify your niche or topic.
- Use a keyword tool to find relevant keywords.
- Analyze the search volume and competition.
- Choose keywords that match your content goals.
Remember, long-tail keywords are more specific and often less competitive. Include a mix of both short and long-tail keywords.
On-page Optimization
On-page optimization makes your content more visible to search engines. This involves several key elements:
| Element | Optimization Tips |
|---|---|
| Title Tags | Include primary keywords. Keep it under 60 characters. |
| Meta Descriptions | Summarize content. Include primary keywords. Keep it under 160 characters. |
| Headings (H1, H2, H3) | Use keywords naturally. Maintain a logical structure. |
| Content | Write high-quality, unique content. Include keywords naturally. |
| Images | Use descriptive file names. Add alt text with keywords. |
| Internal Links | Link to related content within your site. |
Follow these tips for effective on-page optimization. It improves your site’s visibility and ranking.
Credit: www.hostinger.com
Launching Your Website
Once you have designed your website on Hostinger, it’s time to launch it. This step involves a few final checks and then going live. Follow these steps to ensure your website launches smoothly.
Final Checks
Before launching, perform these final checks:
- Check all links: Ensure all internal and external links work.
- Test forms: Verify that all forms submit correctly.
- Review content: Proofread all text for errors.
- Mobile-friendly: Make sure your site works on mobile devices.
- Speed test: Use tools to check your site’s loading speed.
Address any issues found during these checks. This ensures a smooth user experience.
Going Live
Now, you’re ready to take your website live. Follow these steps:
- Domain settings: Ensure your domain is correctly set up in Hostinger.
- Publish site: Click the publish button in your website builder.
- Check live site: Visit your domain to ensure everything displays correctly.
- SEO settings: Update SEO settings for better search engine visibility.
Once live, monitor your website to ensure it runs smoothly. Regularly update content and fix any issues promptly.
Frequently Asked Questions
Can I Make A Website With Hostinger?
Yes, you can create a website with Hostinger. They offer easy-to-use website builders and hosting plans.
Is Hostinger A Good Website Builder?
Yes, Hostinger is a good website builder. It offers user-friendly tools, customizable templates, and affordable pricing plans. It is suitable for beginners and small businesses.
How Much Does It Cost To Host A Website On Hostinger?
Hostinger’s website hosting starts at $1. 99 per month for the Single Shared Hosting plan. Other plans vary in price.
Can I Upload My Own Website To Hostinger?
Yes, you can upload your own website to Hostinger. Use the Hostinger File Manager or FTP to upload files.
Conclusion
Creating a website on Hostinger is simple and efficient. Follow the steps outlined to launch your site quickly. With Hostinger’s user-friendly interface, you can have a professional website in no time. Start building your online presence today and watch your site thrive.
Happy website building!


